Thursday, February 4, 2016

Flying Through the Night Sky

#stampinup   #saleabration2016   My BFF Lynn and I are hold a Sale-a-Bration stamp camp every year. We love having a bunch of friends come over to share some yummy soup and treats, stamp some great projects, and fellowship together. Today and tomorrow, I'll be showing you the cards that Lynn designed for the stamp camp.

First up, is a great card using the soon-to-be-retiring, get-it-by-February-15 "Sky Is The Limit" Sale-a-Bration stamp set. For this card, Lynn punched a 2" circle from a sticky note and applied it to a Whisper White panel. Then she used a sponge dauber to apply Pacific Point ink all over a Whisper White panel, giving it a bokeh effect. When she removed the sticky note mask, she stamped the airplane from the "Sky Is the Limit" set in Basic Black Archival Ink, so it looks like the plane is flying across the moon in the night sky. Awesome, right?

Lynn always adds extra touches that make a good card GREAT. For this card, she punched 1/2" circle of Vellum Card Stock and attached it to the plane with a Silver Mini Brad, creating a propeller. She adhered this piece to a Basic Black mat.

Next, Lynn cut a 1/2" strip of Vellum Card Stock and snipped off the end. She also cut a 1" strip of Basic Gray Card stock and flagged the end with Paper Snips Scissors. She stamped the sentiment in Basic Black Archival Ink onto the Basic Gray flag. Lynn's extra awesome details for this part of the card included adding a strip of Night of Navy Washi Tape (leftover from the "Watercolor Wishes" all-inclusive kit) and tying on a bow of Basic Black Bakers Twine.

Lynn added the sentiment assembly to a Basic Gray card base, cut lengthwise. I'm loving this card--and I now you do, too, so make sure to order $50 worth of Stampin' Up products by February 15 so you can get the "Sky Is The Limit" stamp set before it retires and is gone forever. Don't haz a sad!!!


Product List

Wednesday, February 3, 2016

Simply Awesome!

#stampinup   One of my favorite sets from the Stampin' Up Occasions catalog is "Grateful Bunch." This set has simple elements that coordinate well for either a stamped collage or a simple design. Today's card features a simple design--one that was showcased in the demonstrator Stampin' Success magazine. I didn't notice the card when I flipped through the magazine--I did notice Mary Fish's take on the card! Mary's designs are always so clean and pretty. It's hard to resist CASEing her work!

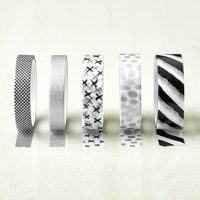
I started with a Whisper White panel and stamped the leaf and branches in Basic Black Archival Ink. I stamped the sentiment in Basic Black Archival as well. I added two strips of washi tape:  the Crushed Curry is from the Cherry on Top Designer Washi collection and the Basic Black is from the Everyday Chic Designer Washi collection. I mounted this piece onto a Basic Black mat, cut slightly larger than the Whisper White panel.

Next, I stamped the flowers from the "Grateful Bunch" set in Basic Black Archival Ink onto a Whisper White scrap. I used my blender pen to pick up some ink in the lid of the Crushed Curry ink pad to add some color to the flower petals. I punched them out with the coordinating Blossom Punch.

Finally, I adhered the flowers to the card with Stampin' Dimensionals and then added the focal piece to a Crumb Cake card base with some more Stampin' Dimensionals.

I think this card is super cute and simply awesome!!


Product List
102845s
[102845]
$10.00

Tuesday, February 2, 2016

Up, Up & Away

#stampinup   Julie Davison is hosting a new sketch challenge each week and I thought I'd play along. I really like this sketch. It's versatile and could be used for any type of card. I'm always low on birthday cards, so I got out my trusty "Party Wishes" set and got to work!

PSC06 Pocket Sketch Challenge #6: Card Layouts to Inspire your card-making + Play along for a chance to win free card layout book! www.juliedavison.com

I think the sketch calls the stamper to start with a piece of designer series paper. I love the It's My Party 12" x 12" Designer Series Stack--the colors and designs are so bold and vibrant. There are also sheets with subtle patterns. I chose one with Melon Mambo and Crushed Curry dots. That meant that I'd need a Melon Mambo card base. I wrapped a length of Melon Mambo 1/4" Cotton Ribbon around the DSP before adhering it to the card base.

Next, I cut a 3-1/4" x 3" piece of Crushed Curry as a mat for a just slightly smaller piece of Whisper White. I stamped the "happy birthday" sentiment in Melon Mambo onto a 1" strip of Whisper White and flagged it with the Banner Triple Punch. I adhered the square piece onto the card with Stampin' Dimensionals and also used Stampin' Dimensionals to adhere the right side of the banner. The left side is adhered flush to the square using Snail Adhesive.

Then I got busy stamping Melon Mambo and Crushed Curry balloons and punching them out with the matching punch from the Party Punch Pack. I put a Stampin' Dimensional on the back of each balloon and added them to the square piece so that they look like they're about to float away. 

I think this card is adorable (if I do say so myself, and I do)! It's very quick and easy to make, too.


Product List

Monday, February 1, 2016

Yay Presents!

#stampinup   One of the things I like best about the "Party Wishes" stamp set in the Occasions catalog is the fun sentiments. Whenever any of my friends lament about a birthday and the fact that they're getting older, I always say that I love my birthday because I get cake and presents. So the sentiment on this card is pure Kathy: "Yay presents!"

Before I show you the card and tell you how to make it, I have to give another shout out to Mary Fish who inspired the layout and the colors. Mary's card was made for this week's Paper Pal Arts color challenge--which I'm also playing along in--and she used a color block technique that is fabulous!! I didn't want to copy her card completely, so I used her idea and created my own. Thanks again for the inspiration, Mary!

PPA-285-Jan28

The challenge colors are so pretty together. I love to play in color challenges because I would never come up with these combinations on my own!

Just like Mary did, I started with a Tip Top Taupe card base, cut lengthwise, and added a Whisper White panel.  I cut 1" x 5" strips of Pink Pirouette, Watermelon Wonder and Tip Top Taupe and adhered them to a 3" x 4-7/8" piece of Whisper White. I attached this color block to the card with Stampin' Dimensionals.

Next, I stamped the cake silhouette from the "Party Wishes" stamp set in Watermelon Wonder onto a Whisper White scrap and fussy cut it with my Paper Snips. I stamped the sentiment in Watermelon Wonder onto a 1.5" strip of Whisper White that I flagged with the Banner Triple Punch. I adhered the flag to the card by placing two Stampin' Dimensionals on the right side to keep it level with the color block and with Snail Adhesive on the left side. I also adhered the cake to the card with Stampin' Dimensionals.

I stamped the single birthday candles in Tip Top Taupe and Watermelon Wonder and punched them out with the coordinating punch from the Party Punch Pack. PRO TIP: To adhere these tiny candles, lay them on a scrap of card stock and run Snail Adhesive over them and then peel them off--they're like stickers!

Finally, I stamped two balloons in Tip Top Taupe and adhered them to the banner with Stampin' Dimensionals. I added strings with my Tip Top Taupe marker.

This card really is yummy! I reminds me of cherry chocolate chip ice cream--mmm! That would be good with some birthday cake!


Product List