Sunday, September 6, 2015

Creation Station: Sensational Single Stamps!


#stampinup  Wow! It seems like it's been forever since we've had a Creation Station blog hop! We post on the first and third Sundays of a month and sometimes there's a fifth Sunday in a month and we don't post...so it has been a little while. I hope that means you're ready for our sensational creations!

This time we're featuring the sensational single stamps in the catalog. I think these stamps get overlooked sometimes. I know I occasionally forget about them. But they're super fun to work with!

Our secondary theme is: bag it up! Some of us will be showing creative uses for Stampin' Up's great line of gift bags.

I initially thought I'd use either the "Get Well Soup" or "Watercolor Thank You" single stamps, but when I went to the stamp shelf, "Blended Bloom" called to me.

I cut a square of Vellum Card Stock and stamped the "Blended Bloom" in Basic Black Archival Ink. Because I'm so impatient, I set the ink with my heat tool. Then I used a Blender Pen and Mint Macaron ink to color the bloom. I really like how the vellum allow colors to layer. I colored the center of the bloom with Hello Honey ink.

For the card, I layered a Basic Black mat onto a Mint Macaron card base. Then, using my Stamp-a-Ma-Jig, I stamped a greeting from the "One Big Meaning" stamp set in Basic Black Archival Ink at the top of a Whisper White panel. 

I attached the vellum to the card stock with a line of snail adhesive at the top. I covered the adhesive with a thin piece of Everyday Chic Designer Series Paper. 

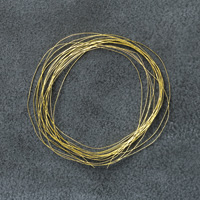
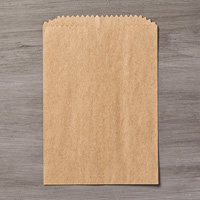
For my next project, I started with a Kraft Tag a Bag Gift Bag and embossed it with the Large Polka Dot Embossing Folder. I cut a 2" strip of Very Vanilla Card Stock and flagged the end with the Banner Triple Punch. I stamped a sentiment from the "One Big Meaning" set onto this banner in Basic Black Archival Ink. I cut a 2" strip of Gold Fancy Foil Designer Vellum and layered this on top so that the sentiment would show. I attached the vellum to the card stock with two glue dots strategically hidden behind a couple of gold polka dots. I wrapped the banners with Gold Metallic Thread and added a Gold Foil Doily behind the banner before attaching it to the bag.

I folded the top of the bag and stapled it shut (pretend there's a wonderful gift inside) and added a length of Basic Black Stitched Satin Ribbon as a finishing touch.

Now you can continue around the hop using either the "next" or "back" buttons below. Be sure to check out all the projects on the Creation Station blog hop. Our design team is here to inspire you! 


www.sarahklass.com/blog/kraft-gift-bags-lots-of-wayshttp://www.inchofcreativity.com/2015/09/creation-station-blog-hop-single-stamps.html


Product List
102845s
[102845]
$10.00

Product List
103683s
[103683]
$5.25

Friday, September 4, 2015

Christmas Gift Tag Ensemble

#stampinup   Well, that's not a very snappy blog title, but it's descriptive and I've put my creativity into today's project. This is the fourth and final project for the September Splitcoast Stampers Creative Crew. The theme for this project is a holiday gift item.

I decided to make a gift item that someone can actually use during the holidays--a gift bag filled with hand-made gift tags. When the "hecticity" of the holiday season strikes, wouldn't it be nice to have a bunch of sweet gift tags to add to your gifts for a more personal touch?

I used two stamp sets on these tags: "Lots of Joy" and "Among the Branches." The Merry Moments Designer Series Paper decided my color scheme of "traditional" Christmas colors: Real Red and Mossy Meadow.  I added lots of different elements: Metallic Foil Doilies, Metal Rimmed Pearls, Designer Buttons, Ribbons, and lots of different punch shapes. I really enjoyed making each tag just a bit different from the last. As a finishing touch, I tied each tag with a length of Real Red or Garden Green 1/8" Striped Ribbon.

After I'd made these tags, I thought they'd be pretty in one of Stampin' Up's Sketched Dots Tag a Bag Gift Bags, tied with some more pretty ribbon, some Gold Sequin Trim, and sporting another tag. I think this gift set turned out right cute.


Product List
135859s
[135859]
$18.00

Thursday, September 3, 2015

A Cheerful Gift Bag

#stampinup   Another one of the September Splitcoaststampers Creative Crew challenges is to use a punch board or one of Stampin' Up's amazing packaging options from pages 150 and 151 of the catalog. 

I chose to use the Gift Bag Punch board for my project--'cause I'll be using one of the packaging options in tomorrow's project!!

I think I mentioned that the Gift Bag Punch board does take a little time to figure out. I highly recommend watching a couple of different You Tube videos and using some scrap card stock. But once you get the hang of it, you could make a jillion of them in no time! And they are totes adorbs, too!!

I used a piece of Season of Cheer Designer series paper for my bag. I tied it with Real Red 1/8" Striped Ribbon. This comes in a two-pack with Garden Green Ribbon. It's wonderful!!

For the tag, I stamped one of the sentiments from the "Among the Branches" stamp set in Mossy Meadow onto a Whisper White scrap. I punched it out with the 2-1/2" Circle Punch. I adhered it to a large Silver Metallic Foil Doily--I'm in love with these!

Isn't this a sweet bag to fill up with sweets for a teacher or a coworker or a neighbor?? As I mentioned--you could make a bunch of them in no time!!


Product List

Wednesday, September 2, 2015

Twinkle, Twinkle Folded Stars

#stampinup  Here's another project I made for the Splitcoaststampers September Creative Crew. This challenge was to make a tag or ornament that could be made at a workshop.

I love Stampin' Up's Typeset Specialty Series Paper. It's vintage and it can be used for almost any occasion. I also love that it's much thinner than regular designer series paper, almost the thickness of a page in a book. This makes it easy to fold into shapes.

I've seen strings of folded stars made from book pages all over Pinterest and I've been looking for an opportunity to try my hand at it. If you search Pinterest (paper stars origami), you can find great projects--and some great instructions on how to make origami stars.

My stars started as an 8.5" by 8.5" sheet of Typeset Specialty Series paper. I followed the tutorial to fold it and cut it into a pentagon shape and then the second half of the tutorial showed me how to fold it into a star. Squee! I loved how easy it was and how super cute these stars turned out. Once you make one, you'll be addicted!


I made two more stars and then threaded a needle with Stampin' Up's Gold Metalic Thread to string them together. I know I'm going to make several more of these and decorate an old-fashioned Christmas tree this year.


If you try your hand at these stars, I'd love to see your pictures!!
 

Product List

Tuesday, September 1, 2015

Silent Night in Denim

#stampinup   You cannot possibly imagine my excitement when I received an invitation to join the Splitcoaststampers Creative Crew for the final 4 months of 2015! I'm so excited and so honored to be part of this remarkably creative group of Stampin' Up demonstrators!!!

All of our September challenge projects will be included in the Splitcoast Stampers Creative Crew Gallery. Check back often, because we're still uploading our projects. This month we're focusing on Christmas projects because it's never too early to start on them, right? The four categories are: favorite DSP from the Holiday catalog; gift packaging; gift items; and gift tags.

Oh, wait! Did I mention the Holiday catalog?! It goes LIVE today and you can start ordering right now!!! Just click on the catalog on the left and start your wishlist. Then click on the "shop online" button on the right and start ordering!!

Today I'm going to share my project that uses my favorite DSP from the Holiday catalog: "Season of Cheer." I love the denim feel to this paper and I think it makes a beautiful, silent, snowy night. I'm also using one of my favorite new sets from the Holiday catalog: "Wonderland."

After choosing this DSP, I used a Night of Navy card base and added a Silver Foil Sheet for a mat to frame the DSP. Before adhering this to the card base, I wrapped some 1/8" Silver Ribbon around the card twice and tied a knot.

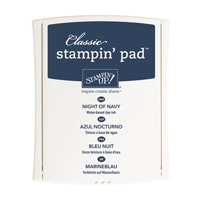
Next, I stamped the "silent night" sentiment in Night of Navy onto a Whisper White scrap and punched it out with the 2-1/2" Circle Punch. I mounted this onto the largest of the Metallic Foil Doilies--love them! They're so versatile and so inexpensive!! I added this element to the card with Stampin' Dimensionals.

Easy-peasy and so pretty (if I do say so myself, and I do)!


Product List