Sunday, November 1, 2020

Creation Station: The Great Outdoors


#stampinup   #creationstation   #faithfulinkspirations  

Can you believe that it's November already?! I surely cannot! In some ways this year has flown by, in other ways, it seems like it's been crawling.  I know this pandemic has been tough, but I'm the kind of person who likes to count her blessings and see the good in a difficult situation. As I'm typing this, I see my neighbors setting up for a socially distance Halloween. Everyone is setting up table at the end of their driveways. It reminds me that we're all in this together and that we're all trying to make the best of a difficult situation. I hope and pray that you and your families are safe and healthy and I hope you, too, can count your blessings and see the good.

 And speaking of good, let's get on with the stamping! Our Creation Station theme for November is “The Great Outdoors.” Our challenge is to create a project feature nature in a monochromatic color palette. I cheated a little and added some subtle colors, but I think my project fits the bill. I was thinking about this card all week and hoping that it would turn out the way I envisioned it. As always, it took a little bit of creative experimentation to get it just right--but that's the fun of the creative process. Here's my nature inspired card.

I wanted to do a simple fun fold, so I started with a 4-1/4 by 5-1/2" piece of Gray Granite Card Stock. This is a half sheet, cut lengthwise. Math-in-my-head isn't my forte, so it took me a couple of tries to get the scoring right. Honestly, if I'd used a piece of printer paper I wouldn't have wasted a half sheet of card stock. Whatever--I make the mistakes so you don't have to. I scored the card base at 2-3/4" at each end so that the sides fold in and meet at the middle. I cut two 2-3/8" by 4" pieces of Basic Gray Card Stock and two 2-1/4" by 3-3/4" pieces of Whisper White Card Stock.

I used the "Waterfront" stamp set to create a scene on each piece of Whisper White Card Stock. The mountains are stamped in Smoky Slate Ink--some full strength, some stamped off once. I stamped the trees in Basic Gray and Mossy Meadow Inks--again, some full strength, some stamped off once. I sponged some Seaside Spray Ink for the sky and sponged Mossy Meadow Ink among and between the trees.

I made a 1" belly band from a sheet of In Good Taste Designer Series Paper and a length of Mossy Meadow Diagonal Stripe Ribbon. PROTIP: I used a few Mini Glue Dots to adhere the ribbon to the belly band.

I stamped a sentiment from the "Merry Moose" stamp set in Basic Gray Ink and cut it out with one of the Stitched Shapes Dies. I adhered this to a Basic Gray Card Stock scalloped circle that I cut with one of the Layering Circles Dies. I punched a hole in the top of the tag and threaded on of the Glitter Star Ornaments through and tied this onto the belly band.

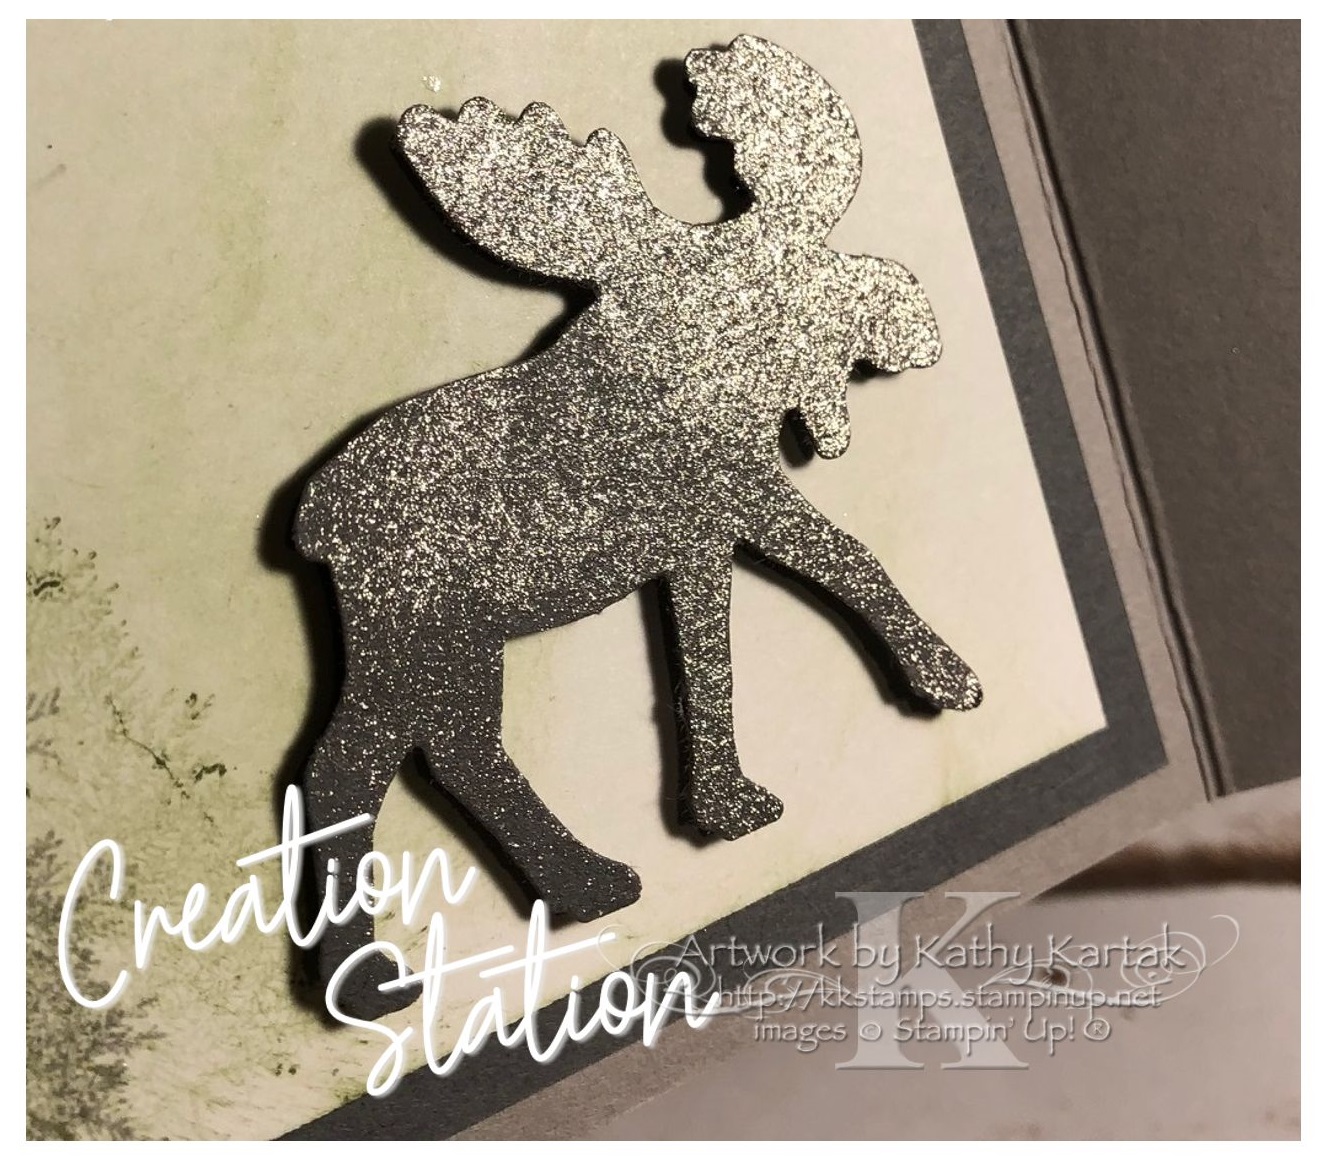
Inside the card, I adhered a 4" by 5-1/4" Basic Gray Card Stock mat. I stamped another nature scene onto a 3-3/4" by 5" Whisper White Card Stock Panel. I used the "Merry Moose" set to stamp some Smoky Slate and Mossy Meadow trees. I also stamped the moose silhouette in Basic Gray. I added a sentiment from the "Tag Buffet" set, also in Basic Gray Ink. Then I lightly sponged on some Smoky Slate and Mossy Meadow Ink. I adhered this to the Basic Gray mat.

I used the Moose Punch to punch a moose from Basic Gray card stock and used a Sponge Dauber to sponge on some Champagne Mist Shimmer Paint. When that dried, I used two Stampin' Dimensionals to adhere the moose to the inside of the card. I like the way the stamped moose gives the punched moose a little shadow.

Well, there you have it--my "Great Outdoors" nature card. I hope you enjoyed reading about my creative process. Next up is the fabulous Jeanna Bohanan. I guarantee she will dazzle you with her project!!


 Stay healthy! Stay safe!


Product List
Moose Punch
[150652]
$18.00

Tuesday, October 6, 2020

Christmas Thoughts

#stampinup   #faithfulinkspirations  I like to make a variety of Christmas cards every year. I send or give out over 100 cards and making 100 of the same card does NOT appeal to me. I don't mind stamping a stack of cards, but I'm not into stamping a mountain of cards! Besides, I create 12 different card designs for my August through November monthly stamp-a-stack sessions. I make enough "kits" for my stampers and one for myself. And I create other cards for my own use. As of today, I have about 35 cards made (and some in-progress that I'm not counting until they're done). That's pretty good for the beginning of October. But I always seem to be writing and addressing them that last week before Christmas. Maybe this year will be different.

Anyway, today's card is one that I designed for the September Christmas card stamp-a-stack session. I like to include a few designs that are more masculine or "woodsy" and this one fills the bill, don't you think?

I embossed a 3-7/8" by 5-1/8" Mossy Meadow Card Stock panel with the Evergreen Forest 3D Embossing Folder. I used one of the Tasteful Labels Dies to cut a label from the center of a 5-1/4" by 4" Early Espresso Card Stock mat. I adhered the embossed Mossy Meadow panel to this. Then I adhered a 1" by 3-7/8" strip of Heartwarming Hugs Designer Series Paper to the front and wrapped a length of Early Espresso Faux Suede Ribbon around. I adhered everything to a Real Red Card Stock card base.

I stamped a sentiment from the "Itty Bitty Christmas" stamp set in Real Red onto Whisper White and cut it out with another of the Tasteful Labels Dies. I adhered this to the Early Espresso Tag and then adhered this to the card with Stampin' Dimensionals.

For some bling--because you can even add bling to a woodsy, masculine card--I added three gold Wonderful Gems to the card.

I even made an inside for the card--which I rarely do!

I stamped two trees from the "Rooted In Nature" stamp set in Mossy Meadow Ink at the bottom of a 4" by 5-1/4" Whisper White panel. I also stamped a sentiment from the "Cherish the Season" stamp set in Mossy Meadow. That looks nice--maybe I should stamp the card insides more often.

Stay healthy! Stay safe!


Product List

Monday, October 5, 2020

Snowflake Wishes

#stampinup   #faithfulinkspirations   I'm simply in love with the Snowflake Splendor Suite on pages 36 to 38 in the August-to-December Mini Catalog! I love it so much that I bought everything in the suite! And you can, too! Just use the "I want it all" item number 155115 to purchase the entire collection. You'll get the Snowflake Wishes Bundle ("Snowflake Wishes" stamp set and So Many Snowflakes Dies--including the 10% off bundle price), the gorgeous Snowflake Splendor Designer Series Paper, the Balmy Blue Glimmer Paper, the sparkly Snowflake Splendor Ribbon, the wonderful Blue Adhesive-Backed Gems, and the fun Winter Snow Embossing Folder. I used practically everything from the suite on this card!

I started by embossing a 3-3/4" by 5" Thick Whisper White Card Stock panel with the Winter Snow Embossing Folder. Then I cut out three snowflakes using the So Many Snowflakes Dies. I set those die-cut snowflakes aside for later. I used Stampin' Dimensionals to adhere this piece to a 4" by 5-1/4" Snowflake Splendor DSP mat. I wrapped a length of Snowflake Splendor Ribbon around this and then adhered it to a Misty Moonlight Card Stock card base.

Next, I stamped a sentiment from the "Snowflake Wishes" stamp set in Misty Moonlight Ink onto Balmy Blue Card Stock. I cut this out with one of the Tasteful Labels Dies. Then I stamped on some Balmy Blue Snowflakes before adhering the label to the card with Stampin' Dimensionals.

To finish the card, I used Mini Stampin' Dimensionals to add two of the reserved die-cut snowflakes to the card. I used the Blue Adhesive-Backed Gems in the center of the snowflakes to cover up the Dimensionals and added a few more gems for fun!

I really love the way this card turned out--and it was really easy to make!  

Stay healthy! Stay safe!


Product List

.png" width="320" />