Showing posts with label tutorial. Show all posts

Monday, February 8, 2021

Valentine's Day Treat Box Tutorial

Valentine's Day Treat Box


1. Start with a 4-1/2" by 6" piece of Basic White Card Stock. Stamp your images. On the sample I used the "Heartfelt" stamp set and Flirty Flamingo, Real Red, and Memento Tuxedo Black Inks.

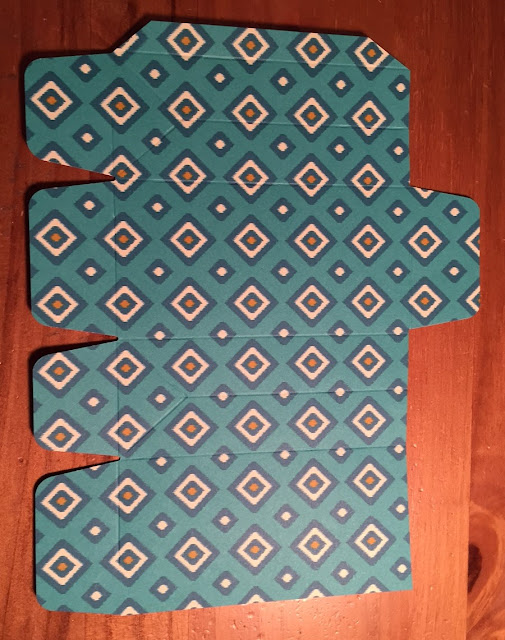
2. On the 4-1/2" end, score at 1", 2", 3", and 4". Rotate one turn and score at 1".

3. Use one of the Stitched Rectangles Dies to cut a window out of the middle as shown. Adhere a velum "window" to the inside of the box. Cut the tabs as shown; bevel if desired. Ad a strip of Tear & Tape to the 1/2" strip.


4. Use a bone folder to crease the score lines and then form your box, bringing the left side over the top of the thin strip with the Tear & Tape and seal.

5. With the window facing toward you, fold in the bottom side flaps, then the back flap, and then fold the front flap toward the back and seal with a Mini Glue Dot.
6. Fill a 1" by 6" cello bag with candy, leaving some head room. Tie the top with Baker's Twine. Insert bag into the treat box. You may need to rearrange the candy so that the cello bag fits nicely.

7. With the window facing toward you, push the sides of the top of the box in toward the center and pinch the top of the box closed.


8. Seal the box closed. You can staple it or use Mini Glue Dots or Stampin' Dimensionals.

9. Score a 1" by 2" piece of Real Red Card Stock at 1". Adhere to the top of the box.


10. Tie a bow in coordinating ribbon and adhere to the box with a Mini Glue Dot.

Sunday, April 5, 2020

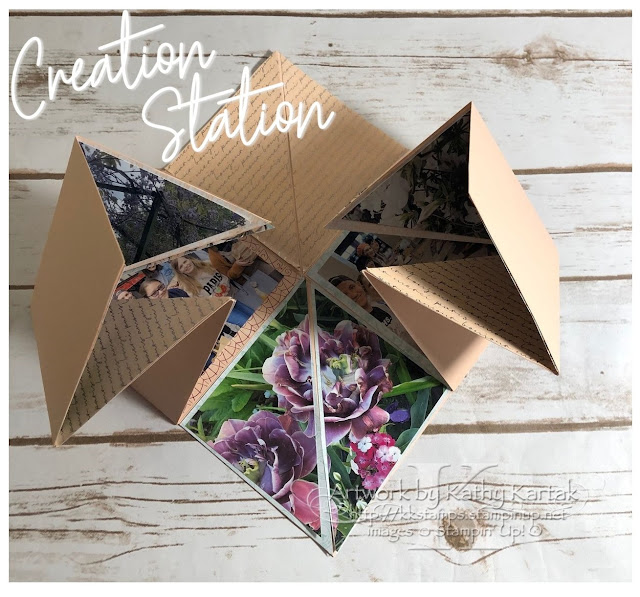
Photo Keepsake Tutorial

Start with an 8" square of card stock. Score at 4-1/4" along each side and then along the diagonal. Fold the sides so that they are "valley" folds and the diagonal so that it is a "mountain" fold. I made three of these squares for my keepsake.


Next, adhere the three squares in a line like this. I used Tear and Tape. You can also use Mono Multipurpose Liquid Glue.


I found it easier to fold in each side to the middle like this.


Once you've folded the keepsake, mark the top (ask me how I know). Add Tear and Tape across the front and the back. Adhere 12" of ribbon to each side.


I adhered a 4-1/4" square of Parisian Blossoms Specialty Designer Series Paper to the front and back of my keepsake (over the ribbon).

Decorate the front and inside as desired.


Saturday, July 18, 2015

Gift Bag Punch Board - Tutorial

Stampin' Up's new Gift Bag Punch Board makes the sweetest gift bags. Check out the ones I made recently for the Creation Station blog hop.

You can make bags that tie at the top, or you can add a flap. Here's a quick picture tutorial for adding the flap.

For a small gift bag, start with a 10" (for the small sized bag) by 8" piece of card stock or designer series paper. A 6" tall small gift bag uses a 10" x 6" paper. The extra 2" are for your flap.

Follow the instructions on the gift box punch board for making the initial scores and cuts for the gift bag. Then rotate the paper to the side that has not been cut and line up the first score line/divot with the "start here" line on the punch board and punch.


Slide the DSP down to the next score line/divot and punch again. You'll end up with a piece that looks like this. The top was cut according to instructions. The bottom shows the extra flap that on the opposite side.


Finally, cut away the extra DSP on the right and left, leaving just the gift bag flap. Your DSP will look like this.


Now, assemble the bag.


Friday, September 12, 2014

TUTORIAL: Mini Magazine Card Holder

As promised, here's the picture tutorial for making the mini magazine card holders. Here's the finished product.

(Stamp Set: Watercolor Winter Too; Ink: Mossy Meadow; Card Stock: Mossy Meadow, Very Vanilla; DSP: Under the Tree Specialty Paper; Accessory: Mossy Meadow Stitched Satin Ribbon)

Start with an 11"x12" piece of cardstock. I used the card stock-weight "Under the Tree" specialty designer series paper from the Holiday mini catalog.

On the 11" side, score at 4-1/2" and 6-1/2". Rotate and score at 6" and 10-1/2".


Cut both the 6" and 10-1/2" sides up to the vertical score lines and stop. (You will do a better job of actually cutting long the line than I did. Ha!)


On the bigger flaps at the top, mark 1/2" on from each of the vertical score lines. Mark 2-1/4" inch from the first horizontal score line.


Cut along the diagonal (from the 1/2" mark to the 2-1/4" mark) on both sides.


Score both lower flaps at 2-1/4".


Cut 1/4" off both lower flaps.


Turn the piece over so that the right (outside) is up. Place two strips of sticky tape along the narrow flaps at the very bottom of your piece.

 
Two scored middle flap will fold over the narrow strip from the bottom, making a "box." Step one: adhere the narrow strip to the side.


Step two: On the inside of the "box," add sticky strip along the edges of the flap that will fold over your box. Fold and adhere.


Add a strip of sticky tape inside the box along the top of the long edge and one down the back of the box, perpendicular to the first piece of sticky strip.


Fold the large diagonally cut flaps up and adhere them to the inside of the "box."


Now your mini magazine holder is ready to decorate!

Before I leave, I want to show you how cool the photopolymer stamps are. You can bend them when you apply them to the acrylic blocks. Here's what the "Watercolor Winter Too" stamps look like in their "natural" state.

Watercolor Winter Too Photopolymer Stamp Set
All Images ©Stampin’ Up!

But here's how you can bend them to make a curved greeting (I left the ink on the stamp so you could see it better.) How cool is that?


I hope you enjoyed the tutorial. Please let me know if you have any questions. And let me know if you see anything else on the blog (past or future) that you'd like a tutorial for!!