Wednesday, February 12, 2014

Awesome, Thanks!

Our area is about to get somewhere between 4 and 8 inches of snow overnight. The county schools have already closed. I'm hoping my work will be closed because I love to do two things on a snow day: 1. Sleep in!! 2. Stamp!! (I guess I'll have to shovel at some point.)

I'd like to say, for the record, that I am NOT "so over" winter! I love winter! It's my favorite season. I'm thrilled to be getting another dump of snow. Mid-Maryland doesn't always get snow, so this winter has been really great. (I might not feel this way tomorrow, after I've shoveled my driveway.) So even though I'm not "over" winter, I seem to be making cards with subtle spring colors--like this one I made for Connie & Mary's Spring 2014 Sketch Challenge (CCMCSPRING14-03).  

I was fiddling around in my scraps pile--you know, that pile of paper and DSP that you've cut off the sheet and that you're planning to file neatly in the accordian folder where you keep you scraps, organized by color in the correct color family, but end up just piling scraps next to your cutter--that pile. I'd used this DSP on one of the Christmas cards I made for my stamp-a-stack series and these strips were just lying there in the pile waiting to be used again. The scraps determined my color scheme--especially since my go-to card base color is becoming Baked Brown Sugar. I'd seen someone else ink up the Yippee-Skippee! greetings with markers and "Awesome...Thanks" fit into my circle and the rest just all fell into place. Of course I also had to use my new fave embossing folder from Sale-a-Bration: Decorative Dots. I've said it before and I'm saying it again in the hope that my wish will waft on over to Riverton, Utah: I hope, I hope, I hope this folder gets carried over at the end of SAB!!

(Stamp Set: Yippee-Skippee!; Card Stock: Baked Brown Sugar, Whisper White, Crisp Cantaloupe, Pistachio Pudding; DSP: 2013-1014 In Color DSP Stack; Accessories: Crisp Cantaloupe and Pistachio Pudding Stampin' Write Markers, 2-3/8" Scallop Circle Punch, 1-3/4" Circle Punch, Circles Collection Framelits, Banner Framelit Dies, Pistachio Pudding Ruffled Stretch Ribbon, Decorative Dots Embossing Folder)

Tuesday, February 11, 2014

Sweet Sorbet Make & Take Idea

I've got a couple of workshops coming up during Sale-a-Bration and I'm looking for ideas for make-and-takes. When I saw this card that Marla Reed made, I knew that I had to CASE it...and then I thought it would be perfect for a make-and-take. I love Marla's stamping style--it's so fresh. The colors on this card are so sweet. I never would have thought about putting Sahara Sand and Pool Party together, but this combo rocks! I used a different background stamp on the tag and I used the Elegant Butterfly punch rather than the Bitty Butterfly punch that Marla used.

So this is one of my ideas for a workshop M&T. I have another up my sleeve that I'll share later this week. I'm hoping for a snow day on Thursday so I can stamp all day!!!

(Stamp Sets: Perfect Pennants, Papillion Potpourri, Delicate Doilies; Inks: Pool Party, Basic Gray, Summer Starfruit; Card Stock: Pool Party, Sahara Sand, Basic Black, Whisper White, Crisp Cantaloupe, Summer Starfruit; DSP: Sweet Sorbet; Accessories: Elegant Butterfly Punch, Scalloped Tag Topper Punch, Pistachio Pudding Ruffle Stretch Ribbon, Whisper White Baker's Twine, Basic Pearls)

Monday, February 10, 2014

Biking in to Say Hi

Today I'm playing along with another of Connie & Mary's fabulous sketch challenges (CCMC289). Here's the sketch:

http://www.createwithconnieandmary.com/.a/6a01310fc1b623970c01a51072cd83970c-pi


And here's my card.

(Stamp Sets: Timeless Talk, Teeny Tiny Wishes; Ink: Pumpkin Pie, Pacific Point; Card Stock: Old Olive, Pacific Point, Pumpkin Pie, Whisper White; Accessories: Pacific Point Striped Ribbon, Banner Punch, Modern Label Punch, Arrows Embossing Folder, Old Olive Candy Dots)
I'd already inked up this bicycle stamp in Pumpkin Pie from the Timeless Talk set and it was just waiting to become part of a new card. I looked at my Color Coach to see what combinations I could use with Pumpkin Pie and came up with Old Olive and Pacific Point. Yay! I have some brand new Striped Pacific Point ribbon from the Occasions catalog that I hadn't used, so I got that out to play with and made the larger pennant. Then I used one of the stamps from the Sale-a-Bration Banner Blast set for the smaller pennant. I used the Arrows Embossing Folder from the Occasions catalog and embossed a strip of Pumpkin Pie card stock and cut one strip of arrow for the diagonal piece. I finished off the card with the Happy Birthday Sentiment from Teeny Tiny Wishes using the Modern Label Punch set off with Old Olive Candy Dots.

When I showed my DD the card (she is my best critic--I really value her opinion even if she's only 14!), she said, "Did you use a staple? That's new." I think she approved.

Friday, February 7, 2014

Love & Laughter

A very sweet couple at my church is getting married soon. The shower is next weekend, so I pulled out the Love & Laughter stamp set and made this card. These colors weren't what I originally had in mind, but I didn't have any Soft Sky Seam Binding--if I had, this card would have gone in another direction. I did find some Soft Suede Taffeta, so I started with that. I think these two Soft colors look great together. They're not the "typical" wedding colors, but I think they're elegant. I stamped the image and sentiment in Early Espresso because I didn't want that to get lost behind the Soft Sky sponging. I added a few basic pearls to give the card a bit of bling, but still retaining that softness without going overboard. 

And the layout is clean and simple--how about that? I must be starting an addiction! Seriously, CAS was hard for me at first, but now I'm starting to get the hang of it. Stay tuned for next week's creations. I'm sure I'll be back to my "more is more" style!!

(Stamp Set: Love & Laughter; Ink: Early Espresso, Soft Sky; Card Stock: Soft Sky, Soft Suede, Very Vanilla; Accessories: Soft Suede Taffeta Ribbon, Basic Pearls)

Thursday, February 6, 2014

I Love CAS

Over at Addicted to CAS, the challenge this week is "love." What a perfect challenge! Valentine's Day is coming up and although I don't usually make my sweetie a card (I don't know why--I just don't), he's been away for almost 3 months and he's coming home the day after Valentine's Day, so I thought I'd better make a card for him. 

This card was pretty quick and easy to pull together and (shocker) there's NO stamping on it!! IKR?! I used  several Stampin' Up product to give the card some texture. I used my Simply Scored Board to score a double border around the black panel (which you can barely see in the upper right-hand corner).  I used the Perfect Polka Dots Embossing Folder to give the white panel a little texture. The I {heart} You sentiment is one of the elements in the Label Thinlit Card Die. I cut one in Silver Glimmer Paper and one in Red Glimmer Paper and adhered just the red heart with a dimensional. I thought the card still needed a bit of ribbon so I added some Real Red Taffeta ribbon with three bows. I hope it's still manly with those bows.

(Card Stock: Real Red, Whisper White, Basic Black, Silver Glimmer and Red Glimmer Papers; Accessories: Thinlits Label Die, Simply Scored, Perfect Polka Dots Embossing Folder, Real Red Taffeta Ribbon)

Wednesday, February 5, 2014

Hello There! Color Challenge

I know I'm a little bit crazy, but I've made it a goal to post something to my blog every weekday this year. So far, so good. Today was a bit of a challenge.  I usually have a few projects made in advance, but today I had bupkis. I knew I was going to play along with the Splitcoast Stampers color challenge (CC464) today, so all day long I was creating a card in my head.  Actually, the card just "came" to me! I love it when that happens! I'm usually CASEing someone else's work, but this design is mine, all mine mwhahaha!

Here's the crazy part:  I left my job at 6:30 this evening, rushed to make it in time to Bible class at my church, followed by a parents' meeting that lasted until 9:00. Then I had to drive home and pick up something really nutritious fast food because my neglected children hadn't eaten dinner and our microwave is broken so they couldn't even make popcorn. I got home at 9:40. We all wolfed down our food. I sorted the mail (bill, bill, recycle, recycle) and then ran up to my stamp room to create this card. I got 'er done in record time (even after I made a few alterations to my design), snapped a pic of it with my iPad, edited the photo and uploaded and blogged about it here and it's 10:40. Wowza! I must be the Flash tonight.

(Stamp Set: Timeless Talk; Ink: Pumpkin Pie; Card Stock: Basic Gray, Pumpkin Pie, Primrose Petals, Whisper White; Accessories: Chevron Embossing Folder, Primrose Petals Stitched Satin Ribbon, Window Frames Framelits, Word Window Punch, Festive Paper Piercing Pack, Pumpkin Pie Candy Dots)
The challenge was to use Basic Gray, Pumpkin Pie, Primrose Petals and a neutral of our own choice. For a "bonus," we were challenged to add an interesting background. I also paper pierced around the Primrose Petals medallion. I know! Pretty cute card (IMHO) that I pulled off in record time. (You do NOT want to see my stamp table!!) 

What will I do tomorrow?! I guess we'll all be surprised!

Tuesday, February 4, 2014

Stamp Camp Projects by Lynn!

My BFF Lynn and I held our annual Sale-a-Bration stamp camp over the weekend. We had a great time and I think our stampers really enjoyed themselves and the projects.. I've already shared my two projects, so I thought it would only be fair to share Lynn's projects, too. She's a creative genius!! I'm so inspired by everything she does. I hope you are inspired, too!


Lynn designed a really cute card box with the Envelope Punch Board. For the belly band, she used the Watercolor Wonder DSP from the Occasions mini catalog. The four 3"x3" cards are made with our Watercolor Wonder Designer notecards, also from the Occasions catalog, and the See Ya Later stamp set that you can earn for free with a qualifying SAB order. So cute. So cute.

Next, Lynn designed a pretty gold "flippy" card with the Circle Thinlits Die. She gold embossed the Blessed Easter image and added some Watercolor Wonder Washi Tape and Fancy Foil Designer Vellum. She also used our Gold Foil Sheets and the Scalloped Tag Topper punch to make a little treat holder. She embossed the treat holder with the Chevron Embossing Folder for added dimension and tied it shut with the Gold Sequin Trim.

Finally, Lynn created a super cute card using my favorite Sweet Sorbet Designer Series Paper and the Petal Parade stamp set from the SAB catalog and the "You Can Never Have Too Much Happy" saying from the Yippee-Skippee! stamp set. We certainly had the right amount of happy at our stamp camp. If you weren't there, we missed you. Hope you can make it next time!!!

Monday, February 3, 2014

The Fab Friday Challenge Is Back!!

The wonderful and creative hosts of the Fab Friday challenge blog took a much deserved break during the holiday season...but they're baaack!! This fornight's challenge is a color challenge:


These are great colors and they're the same as those used in Stampin' Up's Fresh Prints Designer Series Paper Stack (item #132996) in the Occasions mini catalog. I thought about using some of that gorgeous DSP, but in the end, I decided not to.  I did use a few items that I earned free during Sale-a-Bration--the Decorative Dots embossing folder, the Banner Blast stamp set, and the Banner punch. I also used the "Miss You" sentiment from the Lacy& Lovely stamp set--I had it out on my desk for another project and I thought the "Hi" from the Banner Blast set and "Miss You" went together nicely.

(Stamp Sets: Banner Blast, Lacy & Lavely; Inks: Crumb Cake, Real Red; Card Stock: Crumb Cake, Real Red, Coastal Cabana, Very Vanilla; Accessories: Decorative Dots, Banner, Scallop Oval, Oval Punches, Crumb Cake Seam Binding; Real Red Candy Dots)


Friday, January 31, 2014

The Envelope Is The Card

There are so many clever paper crafters out there in the blogosphere.  I'm so grateful that they share their ideas so that we can all be inspired by their creations.  One of the things I've been seeing lately is the "envelope is the card" card made with the Envelope Punch Board (item #133774 $19.95).  You may know that I'm not an "early adopter" of Stampin' Up tools.  I remember saying, "Why would I need a bone folder? I can just use a spoon or my fingernail." For one thing, you can't curl the edges of the Petite Petals with your fingernail.  And now I can't imagine how I ever lived without the bone folder (item #102300 $6.95)!

So when the Envelope Punch Board was announced and demonstrated at convention last year all the demonstrators (except me) were all like, "OOOO" and "AHHHH," and I was all like, "Meh." And then people started making some really clever things with the Envelope Punch Board.  Patty Bennett was the one who won me over with her file folder cards. Click on the link. Aren't they the cutest?!! IKR??!! And, Patty has included a video on how to make these. (Patty is AWESOME!!)

You can watch Brian Piling demonstrate the Envelope Punch Board. 


You have to have it now, right??!! I only have one caution, well, two. First, if you're going to use our designer series paper, you need to use a light touch when you're scoring (ask me how I know) and second, you may become addicted to it!

So here's a little 3" by 3" the envelope-is-the-card that I made using my Envelope Punch Board. Here's the outside:

(Accessories: Retro Fresh Designer Series Paper, Very Vanilla Seam Binding, Envelope Punch Board)

And here's the inside of the card.  I fussy cut the arrows and the greeting.

(Stamp Sets: Hello Lovely, Gorgeous Grunge; Ink: Baked Brown Sugar, Pool Party, Tangerine Tango; Card Stock: Tangerine Tango, Whisper White; DSP: Retro Fresh, Silver Glimmer Paper; Accessories: 1-3/4" Circle Punch, Envelope Punch Board)

Thursday, January 30, 2014

How About a Snow Day Color Challenge? (CC462)

I was pretty productive last week during our mini snowmageddon. I checked Splitcoast Stampers for some inspiration and saw the color challenge for the week: a wild blushing primrose (CC462). In other words: Wild Wasabi, Blushing Bride, and Primrose Petals. 


Love, love, love, these colors together. And wouldn't you know it? These are the colors I had in mind when I started down the path to create something with my new Petite Petals stamp set and matching punch (until I was distracted by Connie & Mary's color challenge).
 
This time, instead of cascading the flowers, I just randomly adhered them around the greeting. I used my bone folder to curl the petals and popped up the flowers on dimensionals.  I used the tiniest pearls from the basic pearls in the center of each flower and on the greeting label. The "dessert" part of the challenge was to add a button with something, like a pearl, on top. So I did just that! 

(Stamp Sets: Petite Petals, Timeless Talk; Inks: Wild Wasabi, Blushing Bride, Primrose Petals; Card Stock: Wild Wasabi, Blushing Bride, Primrose Petals, Whisper White;Accessories: Primrose Petals Stitched Satin Ribbon; Petite Petals, Modern Label & Word Window Punches: Basic Pearls; Whisper White Designer Button; Adorning Accents Edgelits and Embossing Folder)

There are loads of stamping challenges on the various stamping sites. You should never be without inspiration! I hope my little blog inspires YOU!!


Wednesday, January 29, 2014

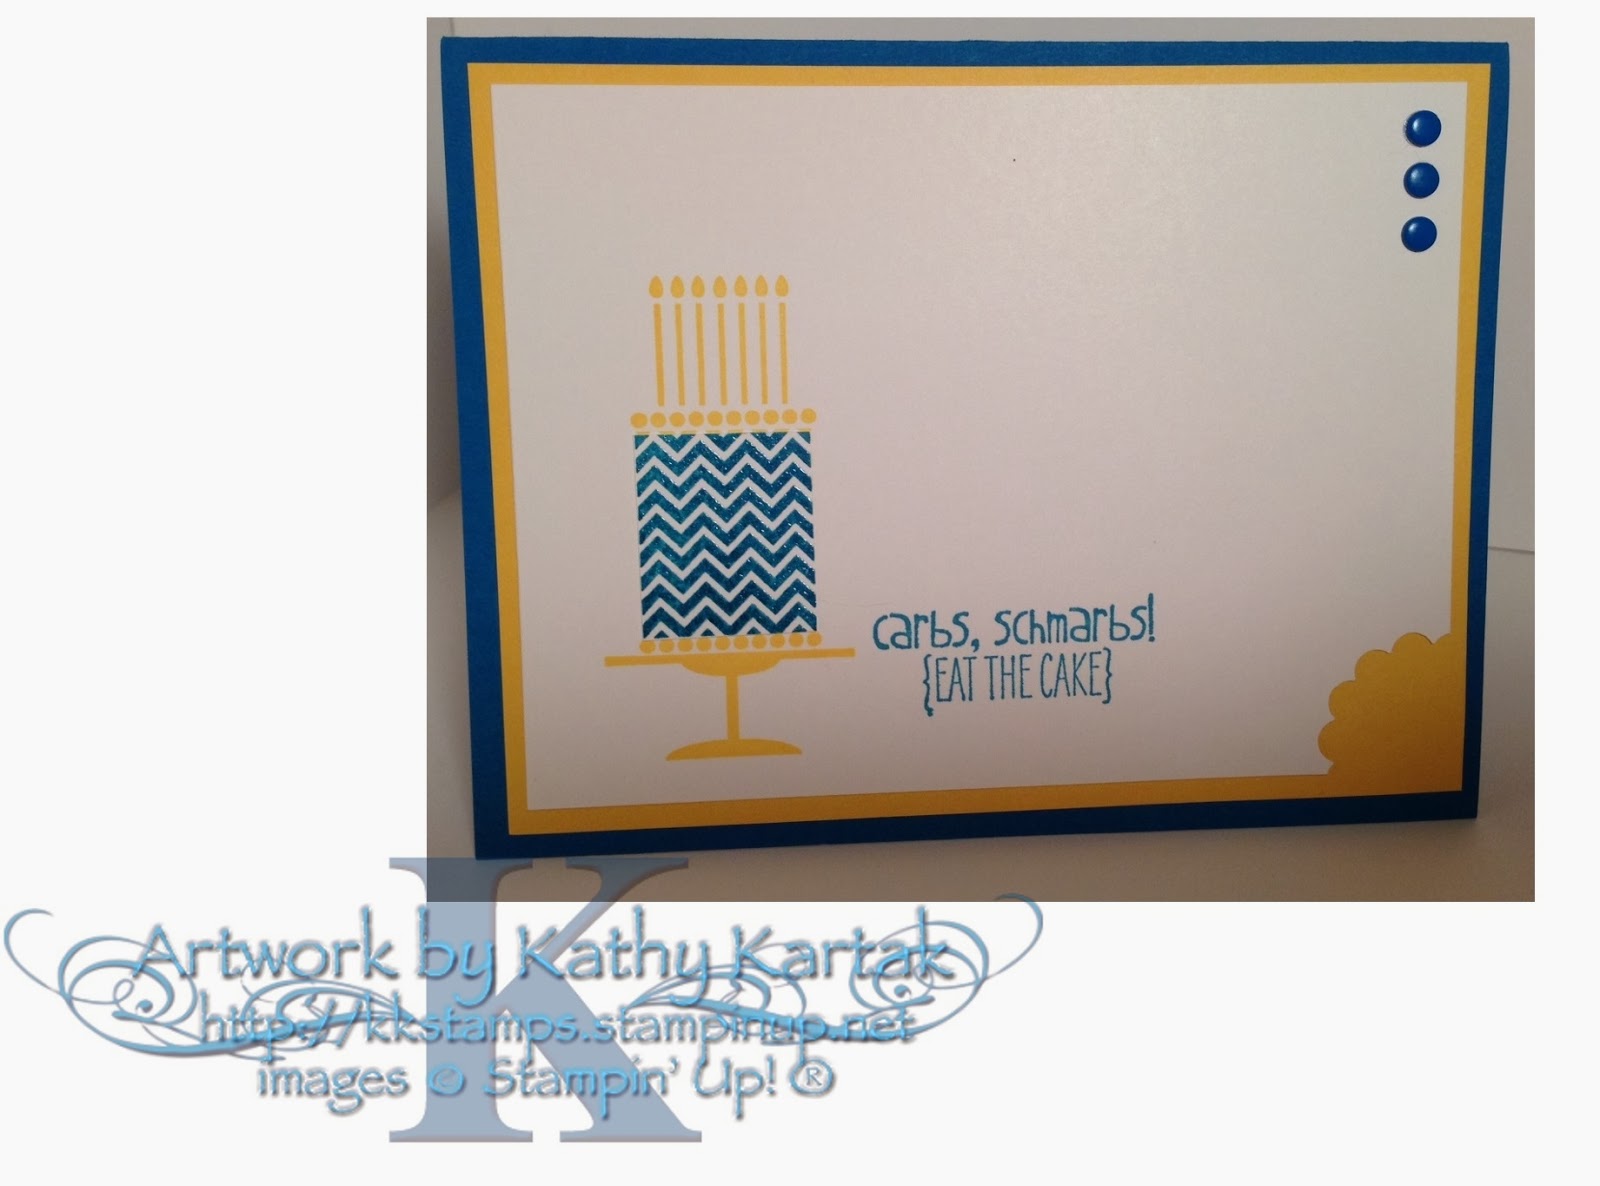
Take a Bite! (CAS256)


Last week I was off on Monday for the Martin Luther King federal holiday and got a bonus day off (well, I had to take vacation time) on Tuesday because we were fixin' to have a blizzard. What's a girl to do? Why, stamp, of course! 


Last Monday's Splitcoast Stampers Challenge was a clean and simple challenge in which you had to use scallops in some way.  I made my clean and simple card and thought it turned out right cute, but then I realized there was no scallop. "Oh well," I thought,"it's still cute and I'm sure my thousands of blog followers will love it!" Then I had a flash of inspiration and realized I could use a scallop in a unique way. Yep! That's the ticket. It's even cuter now, IMHO.

(Stamp Sets: Birthday Cake, Yippee-Skipee!; Ink: Daffodil Delight, Pacific Point; Card Stock: Pacific Point, Daffodil Delight, Whisper White; Accessories: Brights Candy Dots, Clear Embossing Powder, 1-1/4" Scallop Punch)


Tuesday, January 28, 2014

Sale-a-Bration Starts Today!!!

It's that time of year again! Sale-a-Bration time! From now through March 31st, you earn a FREE item from the Sale-a-Bration catalog with every $50 you spend. Oh my goodness! If you've been on my blog in the last week, you've seen some of the yummy SAB products. I promise more in the next few days, but now I need to tell you ALL about Sale-a-Bration.

There are three ways to take advantage of Sale-a-Bration. Flip through the SAB catalog over there on the left side of the website. Once you see the amazing SAB freebies, you'll want to shop so that you can earn them! Just click on the "shop" button in this post and you'll go straight to my online store.


I have a few dates open if you'd like to host your own event so you can earn and additional $30 with a qualifying party. Contact me TODAY to schedule your event!


And now is a great time to join Stampin' Up as a demonstrator. You'll get to choose $150 worth of products for only $99!  You'll get me as your fabulous "upline" and you'll receive the bi-monthly Stampin' Success magazine with great ideas for workshops and new techniques. Ask me today why I'm a demonstrator and why I LOVE IT!! Or, just click on "join" and go right to the sign up page!

Monday, January 27, 2014

St. Agnes Holiday Craft Night


One of my wonderful friends from church works with the St. Agnes Breast Center in Baltimore, Maryland.  Every year they host a different fund raising event and I've helped out in small ways--donating baskets of stamping supplies or stamped projects for their auctions. This year, they decided to host a holiday craft night for their patients. The idea was to have the patients make a few small items that they could give as gifts during the holiday season. Many of the women brought their children or grandchildren.

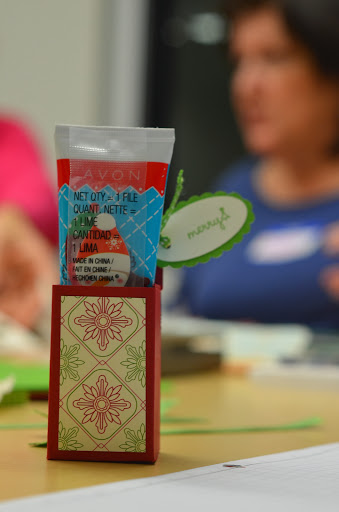
I decided I'd make a little project I'd seen on Splitcoast Stampers in their Weekly Inkling tutorial. I made one of these as a pillow gift for my BFF's first convention and it was quick and easy, and ever so cute! I thought it would be an ideal project for the guests at the St. Agnes holiday craft night. (I'm not including a supply list because just about everything is retired.) The boxes are filled with a small tube of hand cream and the cutest snowman emery board!


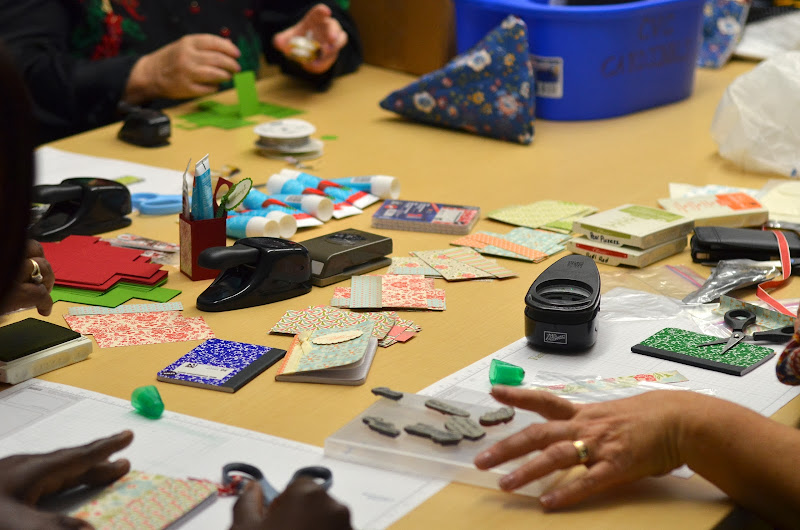
I'd love to show you the ladies and kids making all the projects, but I didn't ask them if they would mind having their pictures on my blog. So for privacy's sake, here's a picture of our set up, with our guests kept anonymous. My project is on the left. My BFF Lynn's project--covered notepads--is on the right.


I hope we can do this again next year--it was fun and rewarding!!