This card requires some water coloring. I'm not a fan of water coloring--do you notice the word "coloring"? Yeah, I don't like to color and adding water to the recipe, well, that could spell disaster. But, I forged ahead and I'm pleased with the results.
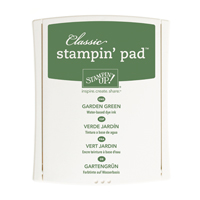
I stamped the large rose image in Basic Black Archival Ink onto a Shimmery White panel. The Shimmery White Card Stock is great for water coloring since it allows the colors to move. I dipped my Aqua Painter into some Rose Red ink that I'd squeezed into the lid of the ink pad. I got the ink really wet, quite diluted, and I just messy water colored the rose. I cleaned my Aqua Painter and then used Garden Green to water color the leaves.
I set this aside to dry while I went to the Big Shot and cut out the Rose Garden frame for the flower. I used the fabulous new Big Shot Die Brush to get all the little teeny tiny pieces out of the rose. That's such a useful tool!! Once I'd prepared the rose frame, I used the Fine-Tip Glue Pen to place a very thin line of glue on the back, and then adhered it right over the stamped and water colored rose image. Cool, huh?
I added this panel to a Basic Black mat using Fast Fuse Adhesive because that ensures the two pieces are adhered tightly and don't warp due to the wet water coloring. I added these pieces to a Rose Red card base using Stampin' Dimensionals.
Finally, I stamped the "happy birthday" sentiment in Basic Black Archival Ink onto a scrap of Whisper White Card Stock and then stamped the frame. I cut these out with another framelit from the Rose Garden set and attached it to the card with Stampin' Dimensionals.
Isn't this pretty card? I might get the hang of water coloring after all!
Product List


No comments:
Post a Comment