First, I ran a quarter sheet of Emerald Envy Card Stock through the Big Shot using the main (biggest) Balloon Pop-Up Thinlits Die. I trimmed the sides along the score line that you'll get when you cut this piece and then I trimmed the top and bottom so that they're approximately the same width as the side borders, like this.
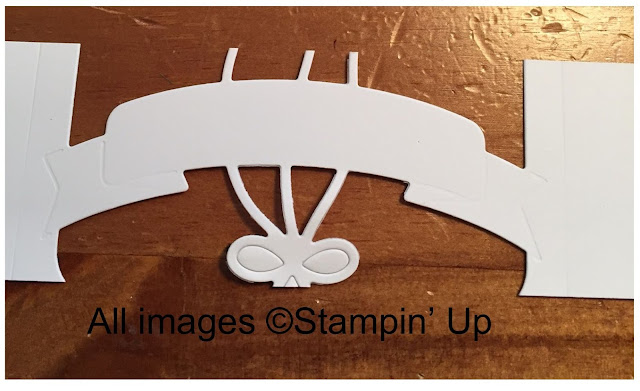
How did I get that Whisper White banner, you ask? There's no separate thinlit or punch to make it, so I ran a strip of Whisper White through the Big Shot with the same thinlit, positioned like this.
The banner comes out like this. You'll need to trim off the excess, so that you're left with just the banner piece. The embossed lines make that easy to do!
Next, I cut a piece of Window Sheet and a piece of Party Animal Designer Series Paper so that they are the size as the Emerald Envy frame. I can't give you the exact dimensions because YMMV* depending on how you've trimmed the frame. I ran some Whisper White scraps through the Big Shot using the polka dot, solid, and striped balloon thinlits. I stamped the solid balloon in Pacific Point with the striped balloon stamp from the "Balloon Adventures" set. I also stamped the banner and the "party on!" sentiment in Pacific Point onto the banner. I adhered all these pieces to the frame with Snail Adhesive. I used Glue Dots to adhere the Window Sheet to the frame.
I used the fabulous new Foam Adhesive Strips on the back of the Window Sheet/frame form the top (outer) side of the shaker card. The filler is several Crushed Curry, Emerald Envy, and Pacific Point bows, cut with the Balloon Pop-Up Thinlits Dies, along with some sequins stripped from a length of Gold Sequin Trim. Because I wanted to make sure the edges of the frame lined up with the edges of the DSP, I centered the filler on the DSP and then applied the Window Sheet/frame to the DSP. That way, I don't have to hope everything lines up and the filler doesn't fall out! I adhered this assembly to a Pacific Point Card Stock lengthwise card base with Fast Fuse Adhesive.
* your mileage may vary
Product List


No comments:
Post a Comment