#stampinup This week's blog hop features flowers, flowers, and more flowers. Our design team will be using the "Flower Shop" and "Flower Patch" stamp sets. And we're using watercolor paper or blender pens or, in my case, Aqua Painters.
For my first card, I used the "Flower Shop" stamp set and matching "Flower Fair" framelits. My color palette is Blushing Bride, Melon Mambo, Hello Honey, Delightful Dijon, Old Olive, and Mossy Meadow. For the largest flower, I used tone-on-tone. For the mid-sized and smallest flowers I used contrasting colors. For the leaves, I stamped off once in Old Olive for the leaf shape and stamped the detail in full-strength Old Olive.
I arranged the flowers on a Tea Lace Paper Doily and adhered them to the doily with Stampin' Dimensionals.
I cut a strip of English Garden Designer Series Paper and topped it with a same-sized strip of Vellum card stock. I adhered the vellum to the DSP with one glue dot, cleverly hidden behind a length of Whisper White 1/4" Cotton Ribbon.
The whole assembly is adhered to a Melon Mambo panel that I embossed with the Honeycomb Embossing Folder and then to a Mossy Meadow card base. I added some small Basic Pearls to the centers of the flowers to complete the card.
For my next card, I thought I'd try the watercolor drip technique that my stamping friend Lyssa Zwolanek has been featuring on her blog, "Song of My Heart Stampers." She also has an always-free tutorial here.
This technique is pretty easy, albeit a bit messy. I used a paper plate to catch my drips. All you need is Watercolor Paper, Reinkers, and Aqua Painters. You'll also need a container for your ink; I used the lid from a box of buttons.
First, wet your Watercolor Paper with the Aqua Painter. Then, holding the paper vertically over the paper plate, pick up one color of ink with the Aqua Painter and paint it onto the top of the Watercolor paper, squeezing the Aqua Painter a bit to make the color run. Clean your brush and pick up the next color ink and repeat. I used Pink Pirouette, Wisteria Wonder, Mint Macaron, and So Saffron reinkers. The inked paper will take about an hour to dry--I think mine took less than that. If you're impatient (I usually am, but I had something else to work on today), you can use your Heat Tool to set the ink.
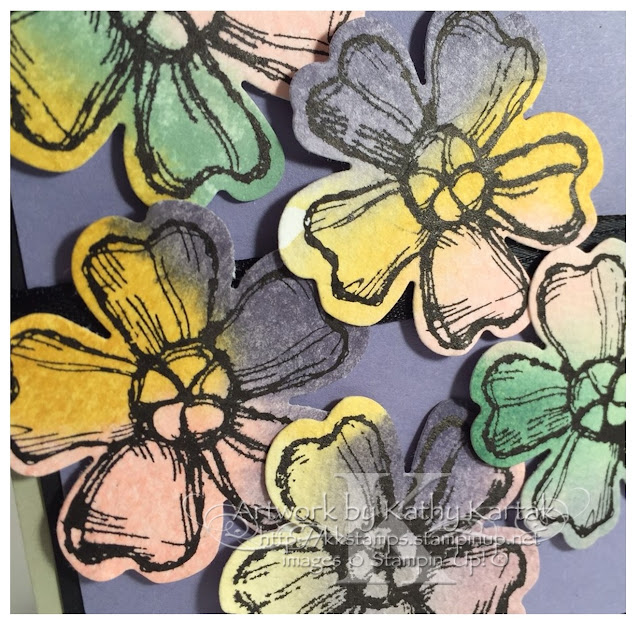
Next, I stamped the pansy from the "Birthday Blossoms" set in Memento Tuxedo Black onto the water-colored paper. Then I punched out the pansies with the Pansy Punch.
I stamped a sentiment in Versamark in the corner of a Wisteria Wonder Panel, sprinkled on some Black Embossing Powder, and embossed it with my Heat Tool. I tied a knot in one end of a length of Basic Black Stitched Satin Ribbon and wrapped it around the Wisteria Wonder Panel. I adhered this to a Basic Black panel and then onto a Sahara Sand card base.
Finally, I put a single Stampin' Dimensional behind each pansy and adhered them to the card.
I really like how the water-coloring turned out. The messiness was well worth it! Here's a close-up of the flowers.
To keep hopping around the blog hop, use the "back" or "next" buttons below. And to purchase any of the items I used on these cards, click on the supply list below the navigational buttons.
Thanks for hopping by!!
Product List for Flower Patch card
Product List for Birthday Blossoms card


Wow - I had never heard of that watercolour drip technique, Kathy. Your card is gorgeous - I'm putting this on my to try list right away! Thanks for sharing :)
ReplyDeleteTwo awesome cards. Your first one is so elegant and I really like the watercolour technique on the second one. I hadn't heard of it before so happy you included the link in your post. TFS!
ReplyDelete