I started with a Tiny Treat Box onto which I added a 2" x 8.5" strip of Red Glimmer Paper. I scored the Red Glimmer Paper strip at 1", 3", 5" and 7" and added a piece of Tear and Tape Adhesive to the end so I could adhere it to the box.
Next, I used the 1" Square Punch to punch a piece of Black Glimmer Paper and the Banner Punch to punch a square of Dazzling Diamonds Glimmer Paper. Here's how to make a small square with the banner punch.

I adhered the belt and buckle to the Red Glimmer strip with Stampin' Dimensionals--I figured that would be easiest for the crafters at the event!
Next, I cut a 2" x 4" piece of Whisper White card stock and a 2" x 4" piece of Holidays Fancy Foil Designer Vellum. I adhered these together with Snail Adhesive, placing the snail behind the thicker lines in the vellum so it wouldn't show through. I used the Envelope Punch Board to round the corners and adhered this piece to the box with Snail Adhesive.
To make the Santa hat, I punched a triangle of Red Glimmer Paper with the Tree Punch, as shown here.
Then, I used the Word Window Punch and the star punch from the Itty Bitty Accents Punch Pack to punch the "fur" trim and star for Santa's hat from Dazzling Diamonds Glimmer Paper. I adhered the "fur" trim to the hat and to the box with Stampin' Dimensionals. The star is adhered to the hat with a glue dot.
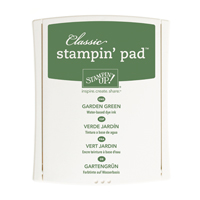
I stamped a sentiment from the "And Many More" stamp set in Garden Green onto a Whisper White scrap and punched it out with the Washi Label punch. I adhered this to the box with, you guessed it, Stampin' Dimensionals.
I cut a 4" x 6" cello bag to 4" x 4" and filled it with candy. I tied the bag with the wonderful Silver Cording Trim.
For my crafting guests, I've made the project pretty simple. Everything is already punched and scored and is all ready to assemble! They'll stamp a sentiment and punch out the label.
I think this turned out so very cute and I hope the guest crafters like it!
Product List


No comments:
Post a Comment