Sunday, February 5, 2023

Creation Station: Simple and Sweet

#stampinup    #faithfulinkspirations    #creationstation

Well, we're certainly into the new year, aren't we? I missed last month's blog hop because I was stuck in Minnesota when a certain airline decided not to fly for 5 days. In the end, it all worked out because we got to visit with some family and friends we hadn't originally had time to do and the airline reimbursed us all our extra expenses and gave us a bunch of flight miles. So it wall worked out...except I didn't get to post the project I had actually made in time for the hop. But I'm back for this month's hop!

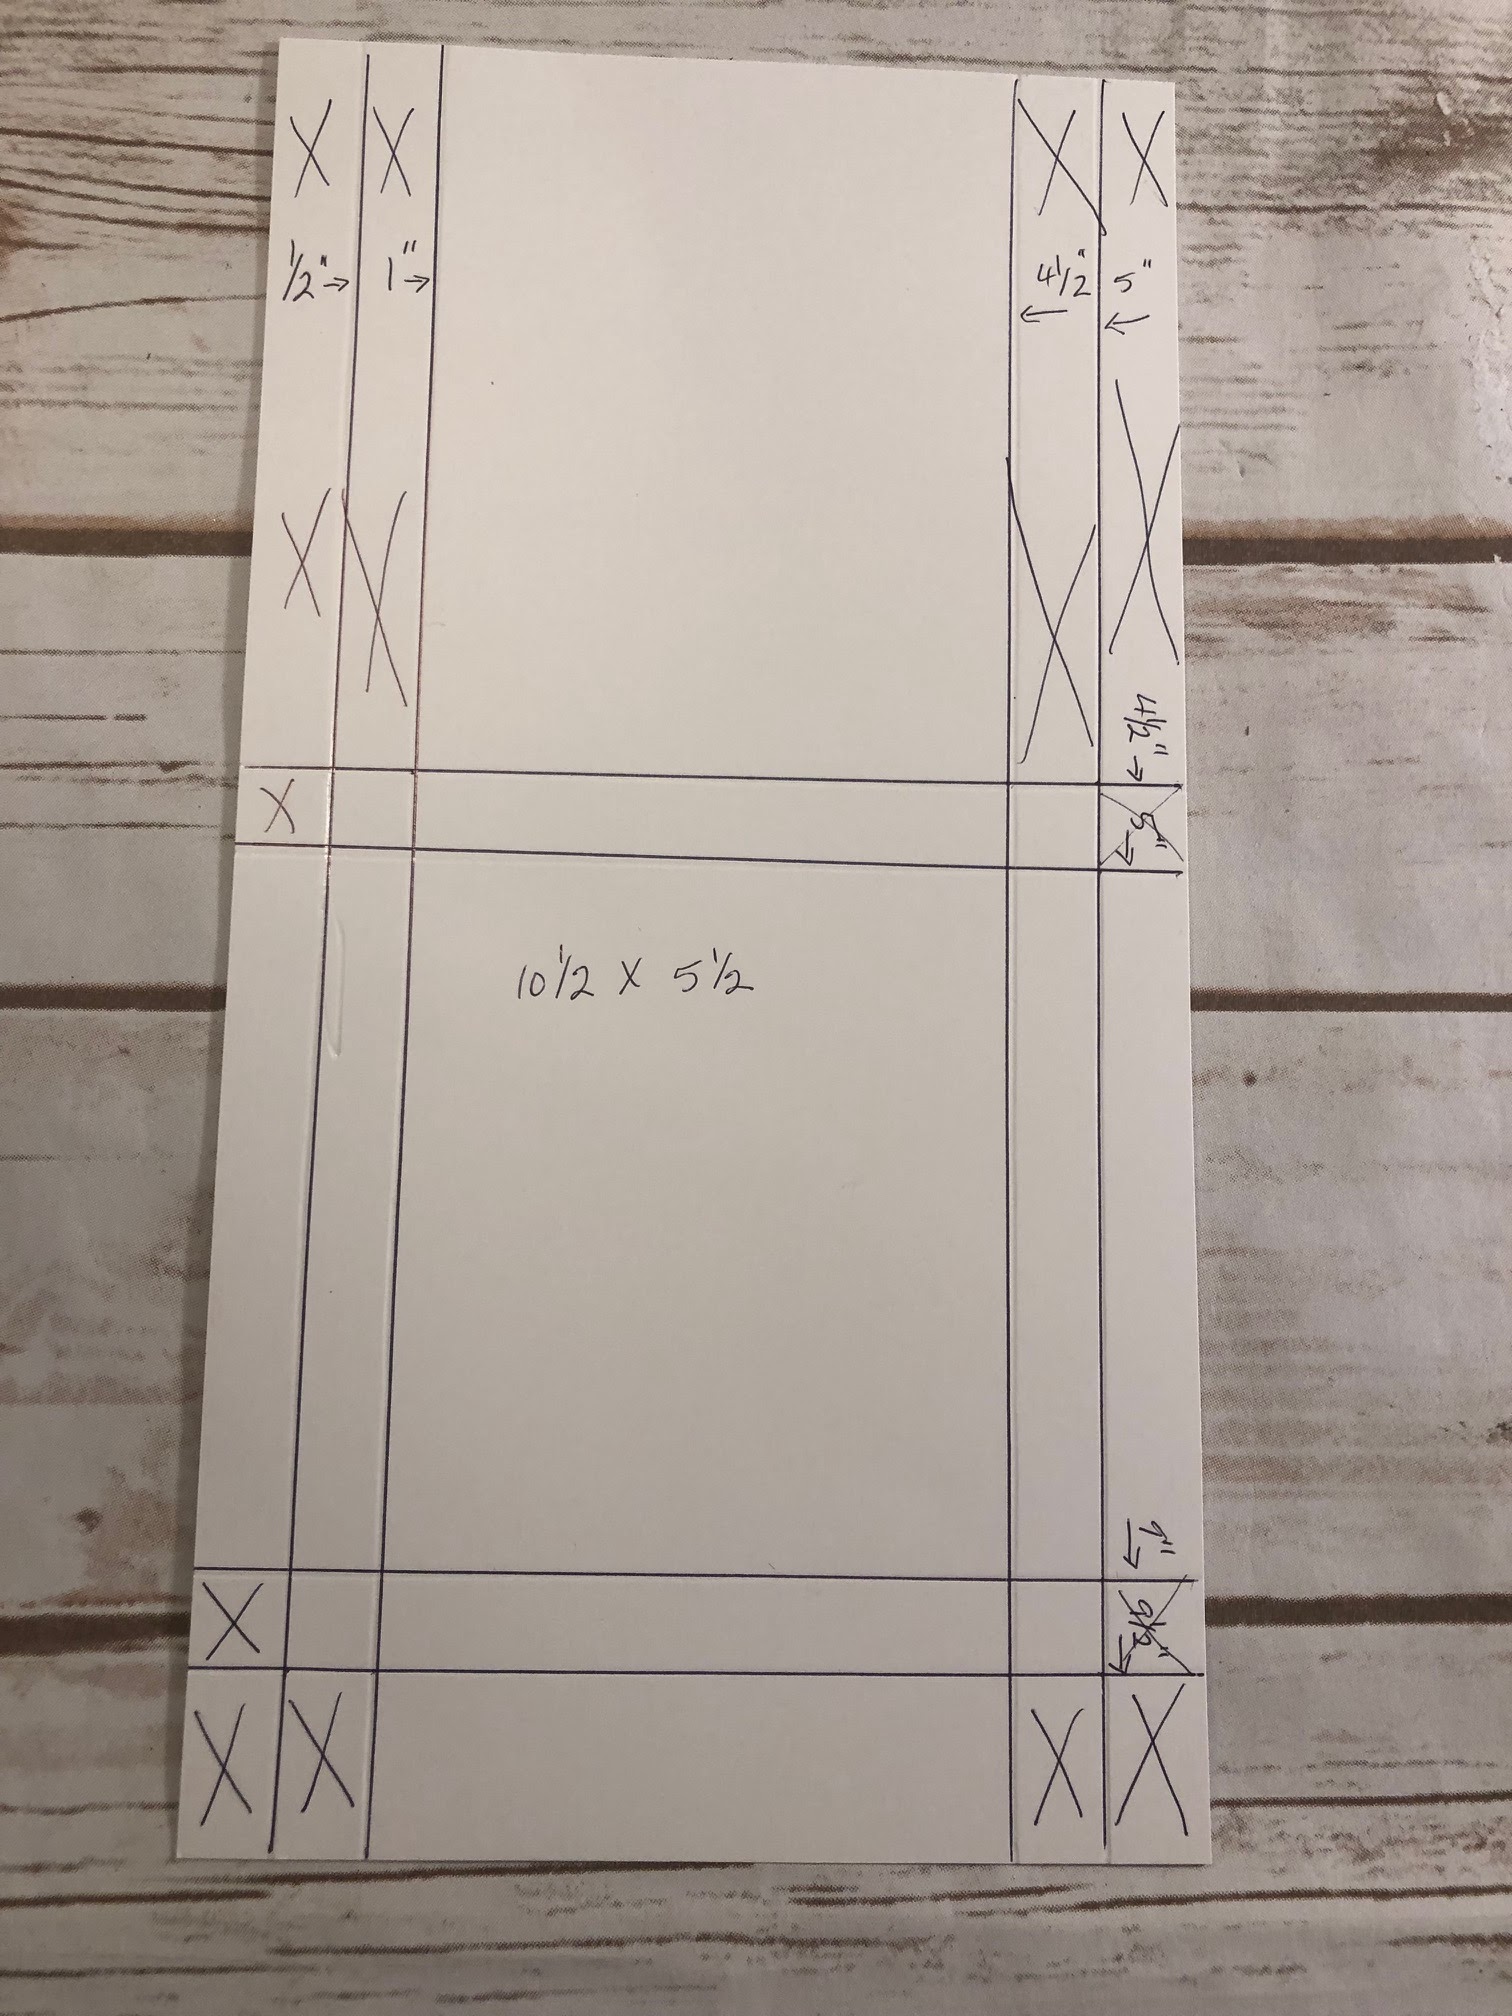
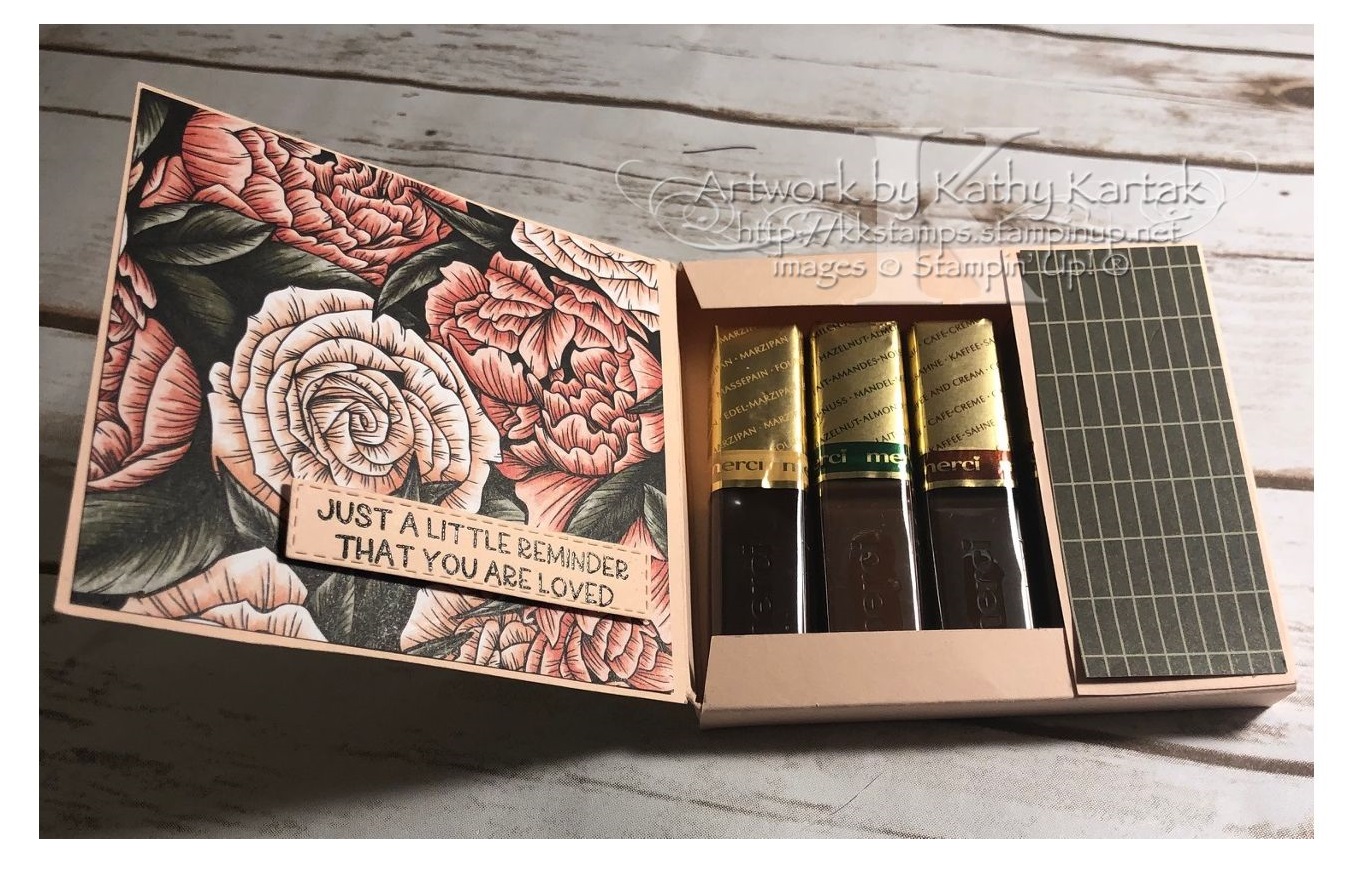
For the month of February, we're showing you projects that are sweet and simple--or just sweet--or just simple. My project isn't exactly "simple," but it's not too complicated either--especially if you follow my tutorial in the link above. But it certainly is "sweet"!!


This sweet little box holds some sweets inside--but before I show you that, let me tell you how I decorated the top. The box is made from Petal Pink Card Stock. I added a piece of Favored Flowers Designer Series Paper on top. (You can get this DSP FREE during Sale-a-Bration with a $50 purchase!) I stamped a stem of leaves from the "Framed Florets" stamp set in Evening Evergreen Ink onto Basic White Card Stock. I cut it out with the matching Framed Floret Die. I used a Blender Pen to color the leaves--just for some subtle color. I stamped a flower from the same set in Memento Tuxedo Black, colored it with Petal Pink Stampin' Blends, and cut it out with its matching die. Finally, I stamped a sentiment in Evening Evergreen onto Petal Pink Card Stock, sprinkled on Clear Stampin' Emboss Powder, and set it with my Heat Tool. This makes the sentiment shine! I wrapped some gold Elegant Trim around the back of the flower and adhered it to the box top with Stampin' Dimensionals. For a final touch, I added a few Pastel (gold) Adhesive-Backed Sequins.

Open the box to reveal the sweet surprise!
The box holds six Merci brand chocolates! I used the floral side of the same sheet of Favored Flowers DSP on the inside lid of the box and a strip of the checked piece on the inside. Isn't it pretty?!

The sentiment is also from the "Framed Florets" set and is also stamped in Evening Evergreen onto Petal Pink Card Stock, and embossed in the same way as the front sentiment. I cut this one out with one of the Stitched Rectangles Dies and adhered it to the box with Stampin' Dimensionals.

Don't forget to check out the tutorial for this box--and other 3D projects--on my tutorials tab above.


Next up on the blog hop is Yvonne Spikmans-Van Bruggen. You're going to love her take on this month's theme!


Product List
Blender Pens
[102845]
$12.00
Simply Scored Diagonal Scoring Plate
[125586]
$12.00
Paper Snips
[103579]
$11.00

Merci Chocolate Box Tutorial

1. Start with a 10-1/2" by 5-1/2" sheet of card stock. Score at 1", 1-1/2", 4-1/2" and 5" on the long side. Score at 4-1/2", 5", 9" and 9-1/2" on the short side.


2. Cut away the X-ed sections, so that you end up with a box template shaped like this. Bevel the tabs; use a bone folder to crease the folds.


3. Fold the box into shape and use Seal+, Tear & Tape, or Multipurpose Liquid Glue to adhere the tabs to the box sides, as shown.

4. Apply adhesive as shown....


5. ...then fold the flap over and adhere to the sides of the box, as shown.


6. Decorate your box. I used 3-3/4" by 3-5/8" DSP on the box top and inside box top. I used 1-5/8" by 3-5/8" DSP for the inside flap.