Friday, June 24, 2016

Quick & Bright Birthday

#stampinup   I was never so glad to see "Mr. Brown" pull up to my house--he had my big Stampin' Up order of NEW product! I had some items that I was able to purchase during the pre-order period (one of the perqs of being a Stampin' Up demonstrator is being able to order product before they're available to the general public), but I felt like I was on a stampin' "diet" because I only had one set of designer series paper and only a few stamp sets. Everybody else was posting NEW stuff online and I wanted mine {she said with a petulant stomp of her foot}.


Finally, right before I left on my business trip, "Mr. Brown" (the UPS man) showed up at my door. Oh happy day!


I love this new single stamp, "Stylized Birthday." I love the font and I think it goes well paired with Pop of Pink Specialty Series Paper and coordinating Pop of Pink Washi Tape. This card is super easy to make and it has such a strong impact. You could make a stack of them in no time and be ready to bring back the birthdays yourself. #imbringingbirthdaysback


I started with a Melon Mambo card base, cut lengthwise. I added a background from a sheet of Pop of Pink Specialty Series Paper. Before I adhered the DSP to the card, I added a length of Melon Mambo Thick Baker's Twine and tied it into a big bow.


Next, I stamped the "happy birthday" sentiment in Melon Mambo onto a piece of Whisper white card stock. I adhered this to the card with Snail adhesive. Then I added two strips of Pop of Pink Washi Tape, just for fun!!


Thursday, June 23, 2016

Sugarplum Thank You

#stampinup   During the Stampin' Up OnStage event last April, Shelly Gardner, the Stampin' Up founder and board member, made a really sweet card. I loved the layout, so I decided to use the layout, but my own elements for today's card.


I started with a Sweet Sugarplum card base. I added a strip of Playful Palette Designer Series Paper and backed it with a just larger piece of Basic Black Card Stock. Next, I punched a heart with the Sweetheart Punch from another piece of Playful Palette DSP and added it to the card with a few Stampin' Dimensionals.


I stamped a banner and sentiment from the "Banners and Badges" stamp set in Basic Black Archival Ink and punched it out with the Duet Banner Punch. I added this element to the card with Stampin' Dimensionals.


Finally, I applied a strip of Snail Adhesive right above the DSP piece and ruched the Sweet Sugarplum Ruched Ribbon across the top.


I love the layers and textures of this card. And it was quick and easy to make--so that's a bonus!!


Wednesday, June 22, 2016

Grateful Flowers

#stampinup   One of my favorite things about attending Stampin' Up events is seeing the variety of card created by other stampers. We all spend hours taking pictures of cards on the display boards. I saw one at the April OnStage event that was so pretty, I just had to CASE (copy and share everything) it!!


This card uses one of my favorite sets from the Occasions catalog. I was so happy to see it--and its matching punch--carried over to the current catalog.


I started with a Wild Wasabi card base and added layers of Blushing Bride and Watermelon Wonder. The stamping is done on a Whisper White panel. I stamped the leaf outlines from the "Grateful Bunch" stamp set in Wild Wasabi. Next, I stamped the group of three flowers a couple of times in Basic Black Archival Ink onto Whisper White scraps. I colored these flowers in Blushing Bride and Watermelon Wonder using a Blender Pen. I adhered the flowers to the card with Glue Dots.


The sentiment from the "Tin of Cards" stamp set--also carried over into the new catalog--is stamped in Wild Wasabi Ink. Each flower has a Basic Pearl in the center.


This card reminds me of a daisy chain and I really love these colors together. They're wonderful for a spring or summer happy hello!


Tuesday, June 21, 2016

Not Too Bright

#stampinup   I've got the most wonderful hairdresser. She gets my color just right and she always gives me a good blow-out so that my hair is straight for a week. And she's so fun! We just chat and chat while she's taking care of me.


Well, after my last appointment, I got home and realized I'd forgotten to tip her. Ugh. I couldn't believe it! Then I thought of one of the cute sentiments in the "Pun Intended" host set would make a cute card that I could send her to apologize for my forgetfulness and enclose a check for the tip I'd forgotten.


For this card, I cut a sheet of Real Red card stock lengthwise. I added a Basic Black panel. Then I cut a Basic Black and Very Vanilla piece of Playful Palette Designer Series Paper just a bit smaller than the Basic Black panel and added it to the card.


Finally, I cut a piece of Very Vanilla Card Stock so that it would layer nicely on the card. I stamped the light in Real Red and the "Sorry, I'm Not Too Bright" sentiment in Basic Black Archival Ink. So cute! I especially like that the filiment in the light spells out "love" because I really do love my hairdresser!!


Monday, June 20, 2016

Sweet Sugarplum Swap Fun

#stampinup   While I'm away on a business trip--to beautiful Salt Lake City, Utah, my Stampin' Up group, the Proverbial Stampers, is getting together for a new catalog gathering. I'm missing all the fun--but I was able to opt in for the "long distance" version since the party was going on while I was so far away from home. I can't wait to see what make-and-takes I get in the mail! Everything will be from the new catalog, so I'm extra anxious to see everything!


The Proverbial Stampers group also had a card-making contest and swap. We made 26 card fronts, one of which was entered into a design contest. While I don't think I've won anything with my design--my fellow teammates are pretty awesome artists--I'm also looking forward to see what great creations I'm going to receive in return. So many things to anticipate!!


For my swap card, I started with a Sweet Sugarplum card front, which I embossed with the Polka Dot Embossing Folder. I cut a strip of Playful Palette Designer Series Paper and backed it with a slightly wider strip of Emerald Envy Card Stock. I adhered this to the card.


Next, I stamped a badge from the "Badges and Banners" stamp sent in Sweet Sugarplum and punched it with the coordinating Best Badge Punch. I also punched a piece of Emerald Envy with the Duet Banner Punch. I adhered the banner behind the badge and added some swirled Basic Black Baker's Twine. I added this element to the card with Stampin' Dimensionals.


Friday, June 17, 2016

Fab & Happy Birthday

#stampinup   The sketch on the Fab Friday challenge blog had me stymied for a little bit and then I struck upon an idea that I really loved. I was so pleased when the idea in my head came out on paper!!


For my card, I started with a Thick Whisper White Card Stock base, cut lengthwise. I stamped the zigzag from the "Work of Art" stamp set in Watermelon Wonder diagonally across the card base. I stamped another zigzag in Wild Wasabi. I used my grid paper to approximately align the two segments of the lines. The "break" between the two segments of the zigzag are hidden behind the rectangular pieces.


Then I cut a piece of Whisper White card stock and another slightly larger piece of Wild Wasabi to as a a mat. I stamped a sentiment from "Watercolor Wishes" in Watermelon Wonder and added a small heart from the same set.


I tied a piece of Whisper White Thick Baker's Twine around this element before adhering it to the card with Stampin' Dimensionals. I thought the card needed a little sumthin-sumthin so I added three white sequins from the Metallics Sequins Collection, using the Fine-Tip Glue Pen.


All Images Copyright Stampin' Up

Tuesday, June 14, 2016

Manly Birthday

#stampinup   This week's Create with Connie & Mary challenge is COLOR! Again, they've come up with an interesting combination that I would never have thought up myself! Color challenges inspire us to use those colors that we sometimes neglect. They really keep the creative juices flowing!

CCMC410


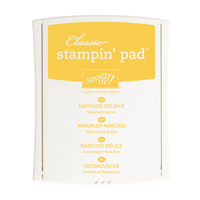
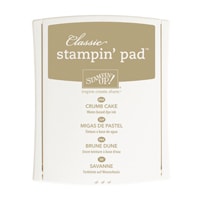
I started with a Crumb Cake card base--because that was the "safe" choice for me. I ran a Daffodil Delight panel through the Big Shot with the Polka Dot Embossing folder. I love those big polka dots--I think they make the card  festive, which is what I want for a birthday card!

Next, I stamped the "happy" balloon from the "Celebrate Today" stamp set in Bermuda Bay onto a Whisper White piece. I stamped the solid balloon in Daffodil Delight onto a Whisper White piece, and then stamped the Bermuda Bay sprinkles on top of it. I cut out both of the balloons with the matching Balloon Framelit Dies.

For the sentiment, I stamped a banner and "birthday" from the "Thoughtful Banners" set in Crumb Cake onto a Crumb Cake scrap. I punched this out with the matching Duet Banner Punch. All the element are adhered to the card with Stampin' Dimensionals. 

This quick and fun card would be great for a manly birthday.


Product List

Monday, June 13, 2016

You Light Up My Life

#stampinup   This week's Pals Paper Arts Challenge is a simple sketch. Sometimes the simple sketches are the hardest--for me, anyway. The challenge is doubly hard because I only have one package of designer series paper while I wait impatiently for my first order to arrive tomorrow. I had to improvise on the background of the design.

PPA-304-June09 

I knew the medallion from the "Moroccan Nights" stamp set would be perfect for the circle element, but I wasn't sure how to fill in the "blank" space. Fortunately, this set has a small star element that worked nicely! So, I stamped the medallion in Cajun Craze onto the corner of a Very Vanilla panel and then randomly stamped the star in Dapper Denim. I adhered this piece to a Dapper Denim mat and then onto a Cajun Craze card base.

Next, I stamped one of the lanterns from the "Moroccan Nights" set in Cajun Craze onto a  2" x 4" Very Vanilla piece. I stamped a sentiment from the "Pun Intended" host set in Dapper Denim. I adhered this to a just-larger piece of Dapper Denim. I tied a length of Dapper Denim Ruched Ribbon around the top of this piece before adhering it to the card.

I really like how the new Dapper Denim In Color works with the classic Cajun Craze for these Moroccan-flavored designs.


Product List

Friday, June 10, 2016

A Little Birdy

#stampinup   I love pairing yellow and gray together. I think its a soothing, modern color combination. For today's card, I stamped the birdcage image from the "Banners and Badges" stamp set in Basic Gray Archival Ink onto a Whisper White scrap and punched it with the matching Best Badge punch. I stamped the sentiment in Basic Gray onto a So Saffron scrap and punched it out with the matching Duet Banner Punch.

Next, I ran a Smoky Slate panel through the Big Shot with the Woodland Embossing Folder. I adhered this to a Basic Gray mat. I tied a length of Basic Black Baker's Twine around this assembly before adhering it to a So Saffron card base.

I adhered the birdcage and banner to the card with Stampin' Dimensionals so that the birdcage looks like it's hanging from a tree limb. As a finishing touch I added a Metal Rimmed Pearl to the top of the cage.


Product List

Thursday, June 9, 2016

A Little Hello

#stampinup   Although I'm impatiently awaiting the arrival of the shipment of my NEW stamps and supplies, I did have a few stamps from the new catalog. That's one of the perqs of being a Stampin' Up demonstrator--if you attend an event, you get a few stamp sets and you can also pre-order stamp sets and supplies prior to the catalog going "live." One of the sets I got at the OnStage Live event is "Badges and Banners." This going to be a versatile set for card making and scrap booking.

I stamped the striped badge in Emerald Envy (a new 2016-17 In Color) onto a Very Vanilla scrap and punched it out with the matching Best Badge Punch. I then stamped one of the banners from the set in Peekaboo Peach onto a Very Vanilla scrap and punched it out with the matching Dual Banner Punch.

Next, I cut a sheet of Emerald Envy card stock lengthwise and ran it through the Big Shot with the Large Polka Dot Embossing Folder. I then cut a 4-1/4" by 2" piece of dotted paper from the Playful Palette Designer Series Paper Stack and added it to a slightly wider piece of Basic Black Card Stock. I adhered this to the card base.


I wound some Basic Black Baker's Twine behind the badge and then adhered the badge to the card with Stampin' Dimensionals. I added the banner directly to the badge with Snail Adhesive. 


You can get any of the supplies to make this is a quick and easy and colorful all occasion card by clicking on the links below and you'll be directed to my online store. Or contact me! I'd love to be your Stampin' Up demonstrator!


Product List