Wednesday, November 30, 2016

Textured Pines

#stampinup   #faithfulinkspirations   I received this awesome card in a swap at my upline's Holiday Catalog gathering.  It was made by Davona Palmer.  It's stunning--and there is NO stamping.  It uses a textured embossing folder and several thinlits/framelits.  Let's see how Davona made this beauty!

Davona started with a Crumb Cake Card Stock card base.  She added a 5-1/2" by 3-3/4" strip of Early Espresso Card Stock.  Next, she embossed a 5-1/2" by 3" strip of Cherry Cobbler Card Stock with the Holly Embossing Folder and adhered that to the card.

Then Davona cut a piece of Very Vanilla Card Stock with one of the Lots of Labels Framelits.  She sponged the edges of this piece with Early Espresso Ink to give it some "age."  She used the Pretty Pines Thinlits Dies to cut the three pine needle sprays from Emerald Envy Card stock and the three pine cones from the gorgeous Copper Foil Sheets.  Davona used the Flourish Framelits to cut the flower from Cherry Cobbler Card Stock and the Christmas Greetings Thinlits to cut the word "peace" from Early Espresso Card Stock.  She arranged all the elements and adhered them to the top of the Very Vanilla label.  For a final bit of bling, Davona added a Gold Metallic Enamel Shape to the center of the flower.

Isn't this just gorgeous with all the layers and textures?! I'm so glad to have received this card in the swap!!

I have one more card to share tomorrow that uses the "Peaceful Pines" and Pretty Pines Thinlits Bundle. Come back and see what I have in store for you!


Product List

Tuesday, November 29, 2016

Tidings of Comfort and Joy

#stampinup   #faithfulinkspirations   Yesterday I shared my amazing BFF's card made with Stampin' Up's "Christmas Pines" stamp set.  I don't have this set myself, so I borrowed my BFF's set to make my own card.  Mine is based on one made by Connie Stewart--but mine is even simpler because I didn't borrow the matching Pretty Pines Thinlits Dies, so my card is DTP--direct to paper.  I also wanted to use the sheet music from the This Is Christmas Specialty Designer Series Paper for my card.

This card is super easy to make and I made a stack of 10 in about 30 minutes!  You'll need a Cherry Cobbler card base, cut lengthwise; a 3-7/8" by 5-1/8" Old Olive mat; a 3-3/4" by 5" piece of the This Is Christmas DSP; and a 3-3/4" by 5" piece of Very Vanilla Card Stock (for the inside).

I stamped the "tidings of comfort and joy" sentiment in Cherry Cobbler Ink directly onto the DSP and then stamped the thicker pine bough image, twice, in Old Olive.  I adhered the DSP to the Old Olive mat and then onto the card base using Snail Adhesive.  I cut 8" of Very Vanilla 1/4" Satin Ribbon (NEW in the upcoming Occasions catalog!) and tied it into a bow.  I adhered this to the card with a Glue Dot. 

This card was so easy-peasy to make that I actually stamped inside the card--I hardly ever do that!  I stamped the pine bough in Old Olive on the corner of the Very Vanilla panel and added the "Christmas Blessings" sentiment in Cherry Cobbler.  I adhered this to the card with Snail Adhesive, too!
I recommend purchasing the "Christmas Pines" stamp set and Pretty Pines Thinlits Dies in the bundle (142496) because you will save money that way and because the thinlits are AWESOME.  Click on any item below to go directly to my online store to make your purchase.  And stay tuned until tomorrow where I'll share another card with NO stamping, using only the Pretty Pines Thinlits!
 

Product List
Glue Dots
[103683]
$5.25

Monday, November 28, 2016

Christmas Pines in Blushing Bride

#stampinup   #faithfulinkspirations   My sweet BFF, Lynn, is super creative. She's the person who got me into stamping in the first place! She really has an eye for color and composition. She created today's card and it's too fabulous to keep it to myself!

Lynn stamped the thicker pine bough from the "Christmas Pines" stamp set onto a Whisper White panel cut at 2-5/8" by 2" (just smaller than ATC size). Then she stamped the sentiment in Blushing Bride. That's a pure genius color combination!! Lynn adhered the stamped panel onto an ATC sized Emerald Envy mat. ATC size is exactly 1/8 of an 8-1/2" by 11" sheet of card stock.

Next, Lynn embossed a quarter sheet of Whisper White Card Stock with the beautiful Pine Bough Textured Embossing Folder. She adhered the stamped piece to the embossed panel with Stampin' Dimensionals and then adhered the whole assembled to a Thick Whisper White Card Stock card base.

For her finishing touches, Lynn used the Fine-Tip Glue Pen to adhere three of the gorgeous Fancy Frost Sequins to the stamped pine bough. Finally, she tied a sweet Emerald Envy Ruched Ribbon bow and adhered that to the card with a Glue Dot.

Clean and simple and simply stunning!!


Product List

Sunday, November 13, 2016

Creation Station: Giving Thanks


#stampinup   #faithfulinkspirations   #creationstation  Hello! Happy Fall! This time on the Creation Station blog hop we're giving thanks. Our design team has created projects that show our gratitude for others.

I've got two cute projects to share with you. First, up is a thank you card that uses the "Cookie Cutter Halloween" stamp set. What's that you say? Halloween is over? Yes, but there's an adorable scarecrow in that set and he can go all the way through fall. I love that Stampin' Up products can be used for more--when you think just a little bit outside the box. In fact, this card uses several items that you might have thought were only for Halloween...but they're not!!

I started by stamping the cute scarecrow from the "Cookie Cutter Halloween" set in Basic Gray Archival Ink onto Shimmery White Paper.  I used this paper because it's perfect for coloring with Blender Pens. I used Pumpkin Pie, Old Olive, Dapper Denim, and Crumb Cake Inks. With the lid closed, I squeezed a little ink onto the inside of the top of the ink pad and picked it up with the blender pen. I don't usually like to color (have I mentioned that before?) but I think the scarecrow turned out pretty cute! I punched him out with the matching Cookie Cutter Builder Punch. I also punched his tiny heart from some Pumpkin Pie Glimmer paper with this punch and adhered it with the Fine-Tip Glue Pen.

  
To build the card, I started with a Pumpkin Pie Card Stock card base, cut lengthwise, and added a Dapper Denim mat that I'd embossed with the Petal Burst embossing folder. I used the debossed side of the paper.

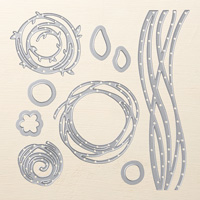
Next, I adhered a Delicate White Doily to the card with Snail Adhesive. I used the Fine-Tip Glue Pen to add the swirly piece of Pumpkin Pie Glimmer Paper cut with the Swirly Scribbles Thinlits. The scarecrow is added with Stampin' Dimensionals.

As a final touch, I added three Old Olive Halloween Night Enamel Dots.  I stamped the sentiment from the "Thoughtful Banners" stamp set in Dapper Denim onto Shimmery White Paper and punched it out with the coordinating Classic Label Punch. 

For my next project, I made a little thank you gift set with the "Moroccan Nights" stamp set and coordinating Moroccan Designer Series Paper. The box holds five Hershey's chocolate nuggets--who wouldn't love that?!


The box is super easy to make with the Simply Scored Board. Here's the template so you can make one, too! (Remove the pieces with the Xs.)


Here's the undecorated box...
...and here's the inside with the candies. I wrapped each in a different piece of Moroccan DSP. The strips are 1" by 3.5". I also rounded the corners of the lid with the Envelope Punch Board, for a more finished look.

Of course the box needs a little bit of decorating and a tag! I tied on a length of Emerald Green Ruched Ribbon and made a tag from a 1" by 4" strip of Very Vanilla Card Stock. I flagged with end with the Banner Triple Punch before I added the sentiment from the "One Big Meaning" stamp set in Emerald Envy.

The tag needed some bling, so I stamped one of the lanterns from the "Moroccan Nights" stamp set in Versamark onto Very Vanilla Paper. I added some Copper Stampin' Emboss Powder and heat set it with my Heat tool. I fussy cut this with my Paper Snips and added it to the tag before I slipped it under the ribbon.

I made a 3" square card to go with the candy box. I cut a 6" by 3" piece of Very Vanilla Card Stock and scored it at 3". I added a 2-7/8" square mat of Emerald Envy. I cut a 2-3/4" square of Very Vanilla and stamped the sentiment from "One Big Meaning" in Emerald Envy and just a smidge of the medallion from the "Moroccan Nights" set in Delightful Dijon. I had a little bit of Emerald Envy Ruched Ribbon left over from the box so I stapled his onto the stamped piece before adhering it to the card with Stampin' Dimensionals.

I hope you like my projects. If you do, I'd be thrilled if you leave a comment.

Now it's time for you to keep hopping around the blog hop. Use the "next" and "back" buttons to see what other fabulous creations our design team has for you!
   

http://denitawright.blogspot.com.au/2016/11/creation-station-design-team-blog-hop.html


Product List
Blender Pens
[102845]
$10.00

Product List
Heat Tool
[129053]
$30.00