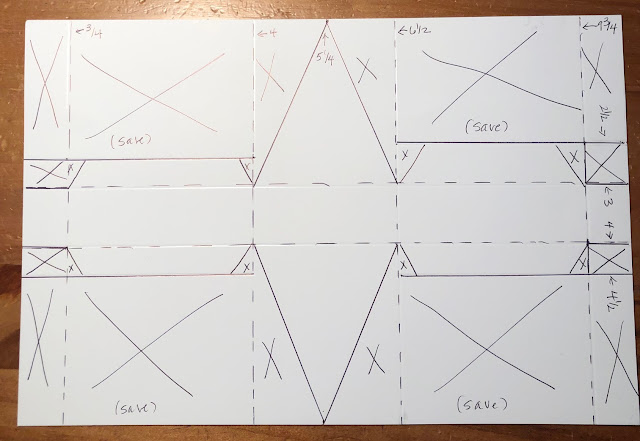
1. Cut cardstock to 10-1/2" by 7".
2. Score the long side a 3/4", 4", 6-1/2", and 9-3/4".
3. Score the short size at 3" and 4". Score at 2-1/2" down to the second horizontal score line; score at 4-1/2" down to the second horizontal score line. Turn cardstock 180 degrees and score at 2-1/2" and 4-1/2".
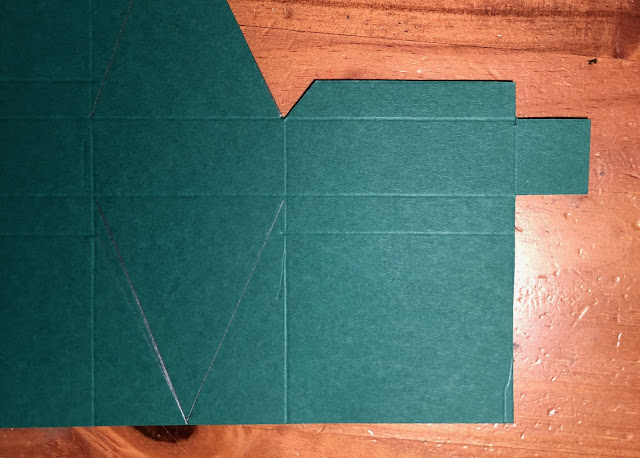
4. Mark 5-1/4" inches on the long side. Use a ruler to draw a diagonal line to the score line. (See pattern)
5. Cut the tabs for the box as shown.
8. Use your bone folder to crease all score lines. Add liquid glue to two flap, as shown.
9. Fold the side of the box up and adhere to the sides of the tree. A bit of the flaps will extend passed the tree. Snip these off.
11. Cut about 12" of ribbon and thread through both holes in the flaps and tie in a knot at the top. Cut another 12" of ribbon and tie a bow around the hanger. (See sample box) The bow slides up the ribbon hanger to allow the box to be opened to retrieve the candy. The bow also helps hold the box closed.
12. Use a Stitched Rectangle Die to cut 4 rectangles from your reserved card stock pieces.
13. Use liquid glue to adhere these strips to the front of the tree in a crisscross pattern, as shown.


Kathy I absolutely love these boxes!! The wonky stitched pieces add great texture and give a kind of industrial or steampunk feel -- totaling appealing!!
ReplyDelete