Tuesday, July 5, 2016

A Fab Celebration

#stampinup   #faithfulinkspirations   This week's Fab Friday color challenge is quite the patriotic combination! I usually have a bit of trouble when the challenge combinations consist of more than three colors, but I felt like I had pulled this one off...until I realized I didn't use the Night of Navy at all. Doh!


I started with a 3" x 4-7/8" piece of Whisper White Card Stock, I used my Misti to line up the bar from the "Thoughtful Banners" stamp set and stamped stripes of Real Red, Pacific Point, and Tempting Turquoise. The lines didn't turn out exactly parallel or evenly spaced, but I kind of like this look, so I went with it. 

I adhered this panel to a Real Red mat that I embossed with the Lucky Stars Embossing Folder. I tied a length of Whisper White Thick Baker's Twine around this piece before adhering it to a Pacific Point card base. (I think I had intended to use a Night of Navy card base, but, whatevs.)

Next, I stamped a banner and sentiment from the "Thoughtful Banners" set and punched it out with the Duet Banner Punch. I adhered this piece to the card with Stampin' Dimensionals. And that's it! Quick and easy!


Product List

Monday, July 4, 2016

Oh Happy Day!

#stampinup   #faithfulinkspirations   Happy Fourth of July! Today's card has a patriotic color scheme as I play along in the Pals Paper Arts challenge.

Pals Paper Arts PPA307

I just got the "Scenic Sayings" stamp set and A Little Foxy Designer Series Paper Stack and I wanted to play with them. You have to play with your new toys, right?! I started with a 3"x 3" square of the DSP and stamped the sentiment in Real Red. I used my MISTI tool to ensure that I could stamp it a couple of times to get a nice, deep image.

Next, I cut a strip of Real Red Card Stock and embossed it with the Lucky Stars Embossing Folder. I adhered this to a just-wider strip of Pool Party Card Stock. I tied a length of Thick Whisper White Baker's Twine around the assembly before adhering it to a Night of Navy card base. Easy peasy! I love these bold, bright, patriotic colors!


Product List

Sunday, July 3, 2016

Creation Station: Gifts from the Garden


#creationstation   #stampinup   #faithfulinkspirations   Wow! How did it get to be summer already?! I blinked and spring was gone! I have to admit: I'm not a fan of summer. I prefer cooler weather, but so far, in central Maryland, anyway, it hasn't gotten too, too hot yet.

Our theme for July's Creation Station blog hop is "gifts from the garden." I know our design team will show you some amazing projects. My project is a little off the rails, I think. I had some design ideas in my head, but I made a huge left turn and my final result is nothing like what I was designing.
You see, I wanted to do a small plant in a decorated paper bag--like this one that I found on Pinterest.

 Need a small gift for someone? Try wrapping a simple garden flower in a brown bag tied off with raffia. Frugal and sweet!:

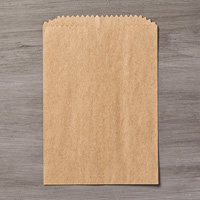
I wanted to use Stampin' Up supplies and all I had on hand was the Kraft Tag a Bag Gift Bags. (The Petite Cafe Gift Bags #135826 would have been perfect!) No problem, I know how to make a gusseted bag--I showed you that in a previous edition of the Creation Station. Only these Tag a Bags are small, so I had to find a small plant that would fit. 

I headed to my local garden store and my only criteria was "small." I had a lavender plant in my hand, but it's the kind that needs to be planted--the roots were hanging out of the plastic pot. I thought about replanting it in a terra cotta pot, but I couldn't find one that was small enough for my project. And then I spied it--a tiny cactus in a tiny pot! It was the perfect size!! So instead of making a sweet, country chic floral arrangement in a paper bag, I went all in with the Festive Birthday suite!


I cut down a Kraft Tag a Bag Gift Bag so that it was just below the rim of the pot. I turned the bag into a gusseted bag and slipped the cactus inside.  

Next, I cut the rectangular banners from a piece of Whisper White Thick Card Stock using one of the Fiesta Time framelits. Then I stamped banners in Pumpkin Pie, Tempting Turquoise, and Crushed Curry. I added the designs in Tempting Turquoise and Pumpkin Pie. These photopolymer stamps make placing the designs on the pre-cut banner so easy!

I tightly tied a length of Whisper White Thick Baker's Twine just under the lip of the pot, so that I could gather the bag tightly. I adhered the stamped banner to the bag with some Snail Adhesive. I untied the baker's twine and then re-tied it on top of the banners.

I thought the cactus looked a little bit lonely, so I added a friend! I stamped the llama from the "Birthday Fiesta" set in Soft Suede ink onto a Crumb Cake scrap. I cut him out with the matching Fiesta Time Framelit. I also cut a piece of Festive Birthday Designer Series Paper using the rectangular banner framelit and added that to the llama. Then, I just poked the llama into the sand. Isn't he just the cutest?!

Since our theme is gifts from the garden desert, I needed a card to go with it. Keeping with the smaller is better theme, I made a 3"x3" gift card and matching envelope.

I cut a 3"x6" piece of Pumpkin Pie Card Stock for the base of the card, added a slightly smaller square of Tempting Turquoise Card Stock as a mat, and embellished an even smaller square of Whisper White Card Stock for the focal piece. I cut a strip of Festive Birthday DSP and adhered it to the bottom of the Whisper White piece. I stamped a sentiment from the "Birthday Fiesta" set in Tempting Turquoise just above that. Next, I stamped the cactus from the same set in Emerald Envy onto a Whisper White scrap and cut it out with the matching framelit. I adhered the cactus to the card with Stampin' Dimensionals. As a finishing touch, I added some sequins from the Brights Sequin Assortment, adhering them to the card with the Fine-Tip Glue Pen.

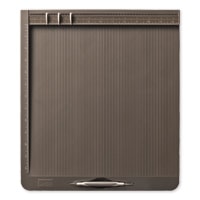
Then I pulled out my Envelope Punch Board and made a coordinating envelope from the Festive Birthday DSP.


And just for fun, I added another cactus to the closed envelope and tied it shut with another piece of Thick Whisper White Baker's Twine.

I'm really pleased with how this turned out, but this was certainly not the dusty, desert road I started down!! It's fun to let the elements create their own project!

Please use the "next" and "back" buttons to keep hopping around the Creation Station blog hop. I know you'll find all kinds of inspiration here! See you next month!


http://justjulieb30.blogspot.com/2016/07/creation-station-blog-hop.html
http://juliesjapes.blogspot.com/2016/07/creation-station-gifts-from-garden.html


Product List