Sunday, July 5, 2020

Creation Station: New In Colors!


#stampinup   #faithfulinkspirations   #creationstation  Hello everyone! I'm so excited for another round of the Creation Station Blog Hop! This month we're creating projects with the new 2020-2022 In Colors. Here they are. Aren't they gorgeous?!


I initially tried to use all the colors on one card, but it didn't turn out as lovely as I'd envisioned it. So, instead, I used each color on five separate cards! I used the same design and technique for each card, but I switched up the sentiments a bit. I used the "Ornate Thanks" stamp set for the sentiments and the large flower arrangement from the "Ornate Style" stamp set. Here's the whole lot of the cards.
Each card starts with a card base made from one of the In Colors. Then, I used one of the Ornate Layers Dies to cut a frame from a 4" by 5-1/4" Whisper White Card Stock mat--and then I used that mat as my next layer on the card. Next, I used the Ornate Floral 3D Embossing Folder to emboss a 3-7/8" by 5-1/8" layer of the same card stock color as the card base. I adhered the Whisper White ornate frame to the card with Stampin' Dimensionals and the embossed piece directly on to of the Whisper White mat.


Then I stamped the large floral image from the "Ornate Style" stamp set in Versamark Ink onto another piece of the In Color Card Stock. I sprinkled on some White Stampin' Emboss Powder and then set it with my Heat Tool.

Then (because I might be a little bit crazy), I fussy cut the images! I do love to fussy cut. I know it's not everyone's idea of fun, but I find it super relaxing.
And then when I'd fussy cut the image, I "stamped" the In Color ink pad onto an acrylic block and used a Blender Pen to pick up the color. I then added some accents onto the leaves and flowers, which really makes them pop! Then I adhered the flower image to the card with Stampin' Dimensionals

I stamped a variety of sentiments from the "Ornate Thanks" stamp set onto Whisper White Card Stock and cut them out with one of the Tasteful Labels Dies. (I love that set of dies so, so much!) and adhered the label to the card with Stampin' Dimensionals.

To finish each card I added three Artistry Blooms Sequins in a coordinating color. So pretty!

But I'm not finished yet! I thought these lovely cards deserved to be placed in a lovely box, so I created a box for them--and a tutorial for you! Click on the tutorial tab above (or click here) and you can see this tutorial and all my tutorials.
The box is made of Cinnamon Cider Card Stock and the top is decorated with a layer of Just Jade Card Stock and topped with an embossed Cinnamon Cider piece. I adhered these layers to the box with Stampin' Dimensionals.  I wrapped the box with a belly band made from the Ornate Floral Specialty Designer Series Paper.

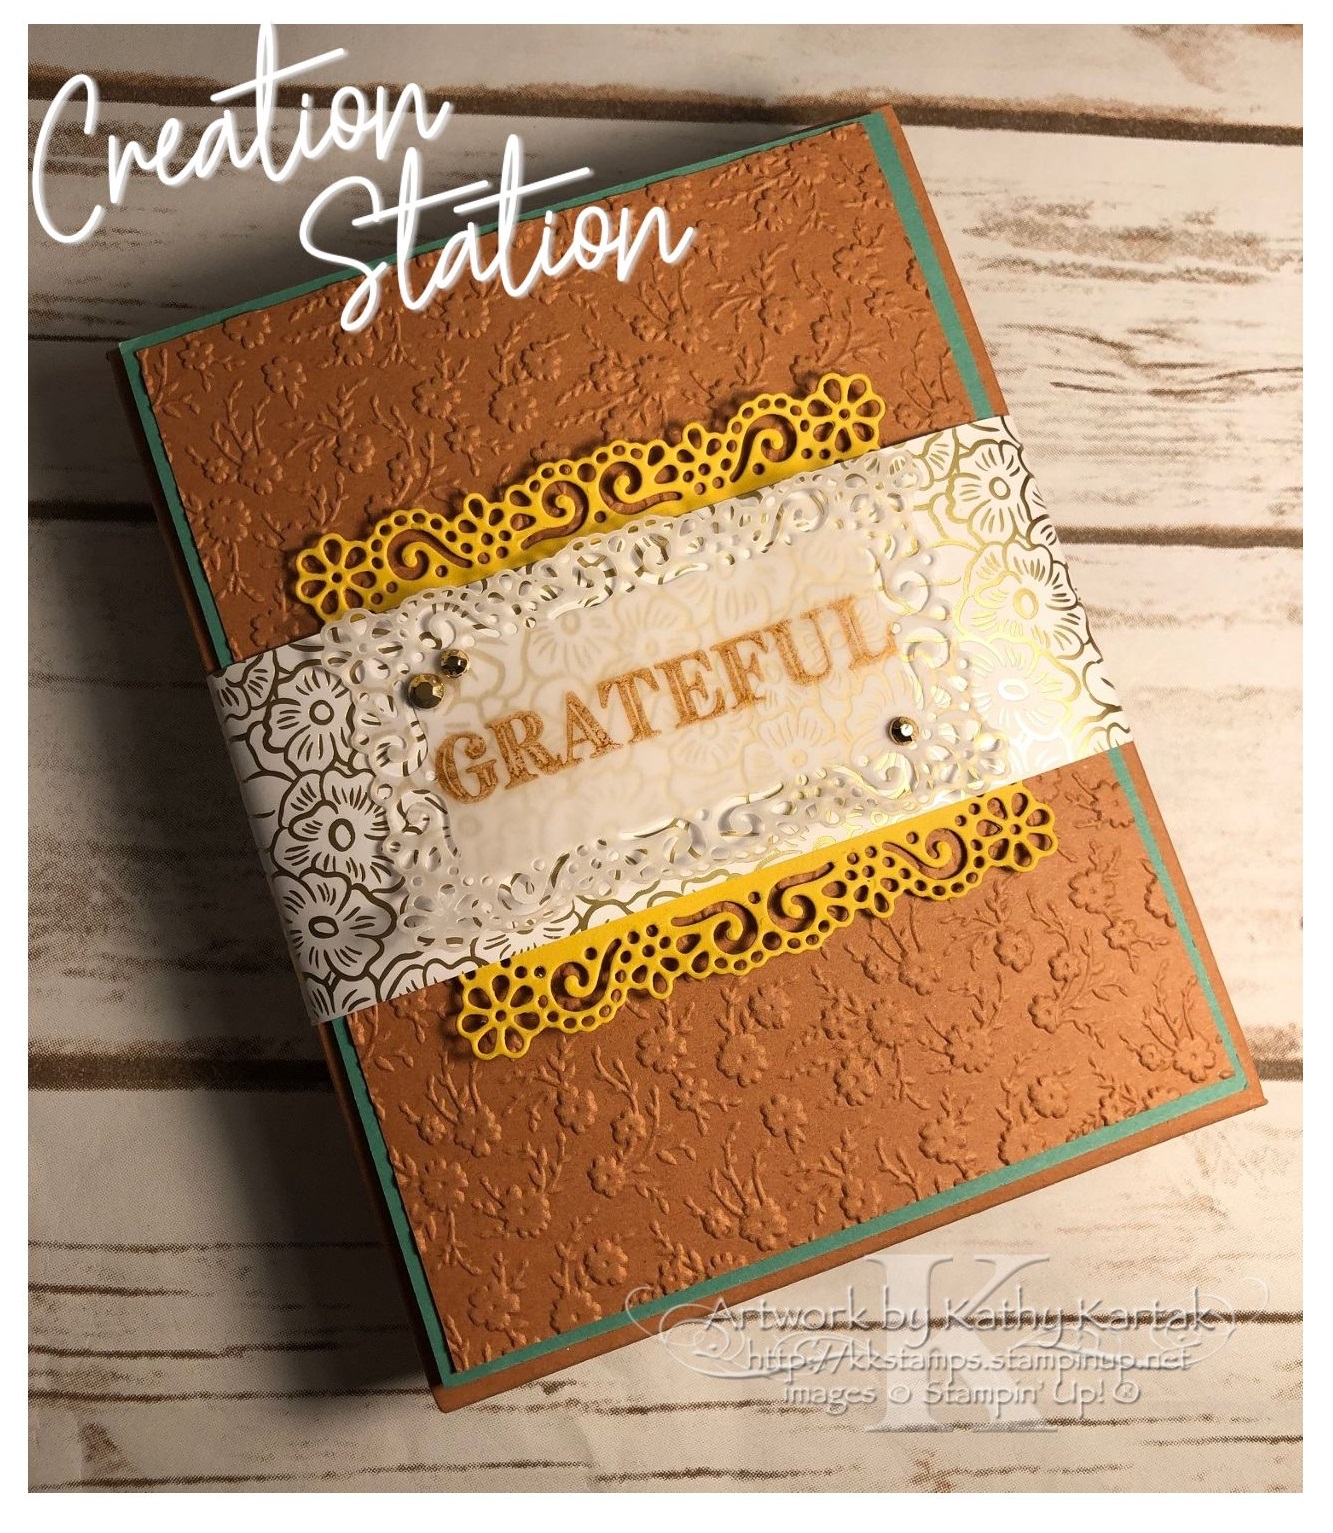
For the label, I used one of the Ornate Layers Dies to cut a frame from Bumblebee Card Stock, which I cut in half lengthwise and adhered to the belly band. I cut the same label from a piece of Vellum Card Stock and stamped the sentiment in Cinnamon Cider Ink. I used another stamp from the "Ornate Thanks" set--and masked the "so" before I inked it up, so that I just stamped "grateful" onto the Vellum Card Stock.  PROTIP: Use your Heat Tool to set the ink on vellum. I adhered the Vellum piece to the belly band with two Mini Glue Dots and covered them by placing some Gilded Gems on top!
Here's the whole kit and kaboodle. I'm very pleased with how this turned out--much better than my original design!
Next up is the fabulously creative Vicki Boucher from Australia! Have fun hopping around the world to see our design team's creations!

https://vickiboucher.blogspot.com/2020/07/creation-station-july-blog-hop-2020.html?fbclid=IwAR0l6U_8i2v9GFcrjajI9qaADEYe6yvOr_Bn_TbLppiuEAx7Coz4Gzy76hU


Product List
Blender Pens
[102845]
$12.00

1 comment:

  1. Oh Kathy, these are fabulous. They look both modern and vintage all in one. They're gorgeous xx

    ReplyDelete